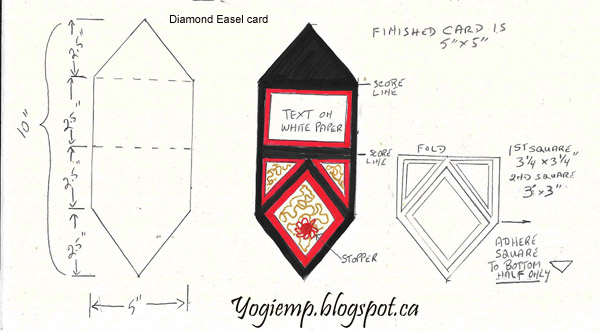
ID: Oct/20Diamond Easel Cards
Created: Oct 8, 2020
Modified:
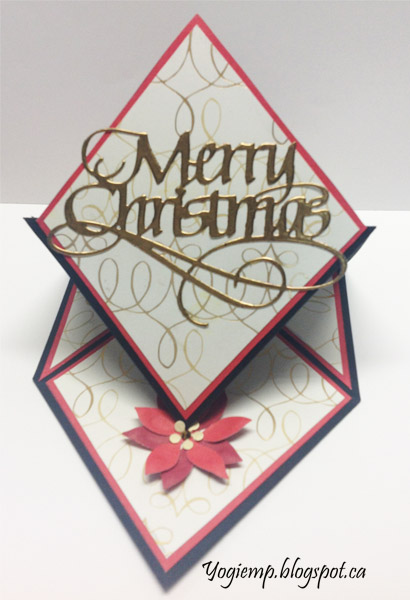
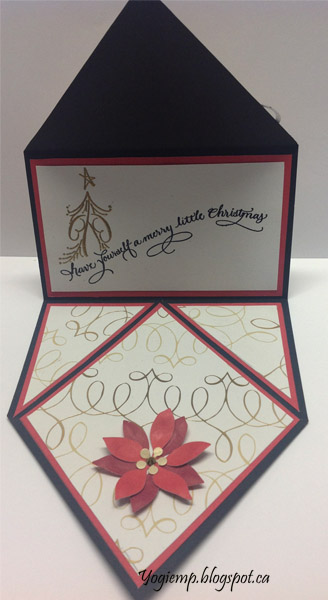
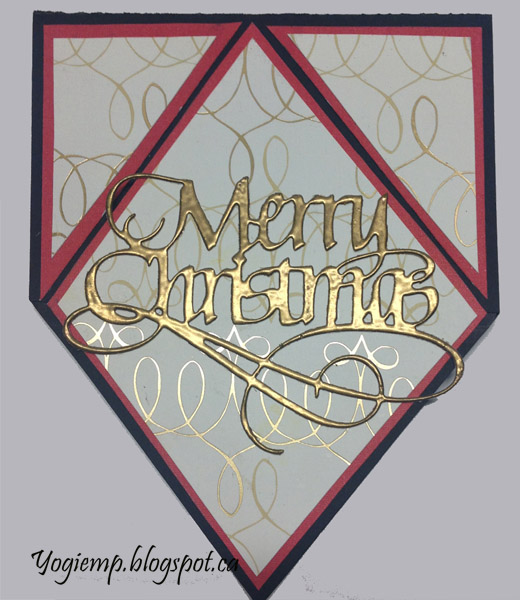
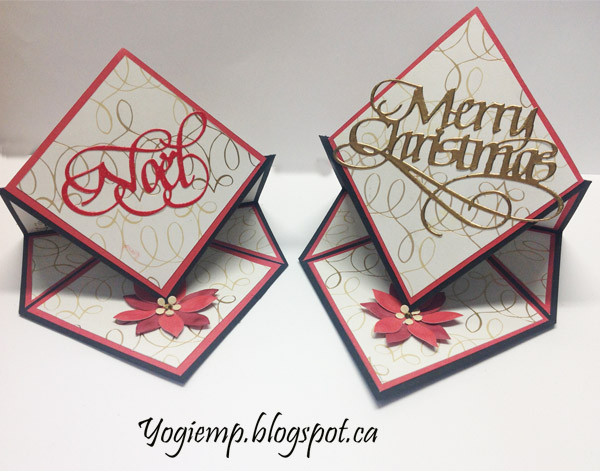
One of the gals at
our Craft Dozen get togethers demo'd this "Diamond Easel
card". Thought I'd try making it... The Merry Christmas one
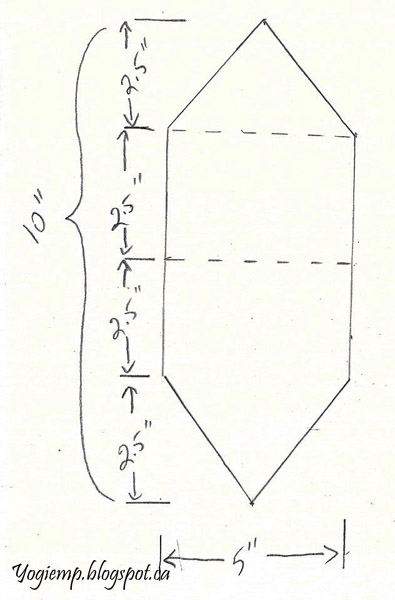
was the first one I did and I wanted it to fit the 5"
x 7" cards I usually make... but that added a WHOLE BUNCH
of calculations to make it work BIG GRIN.
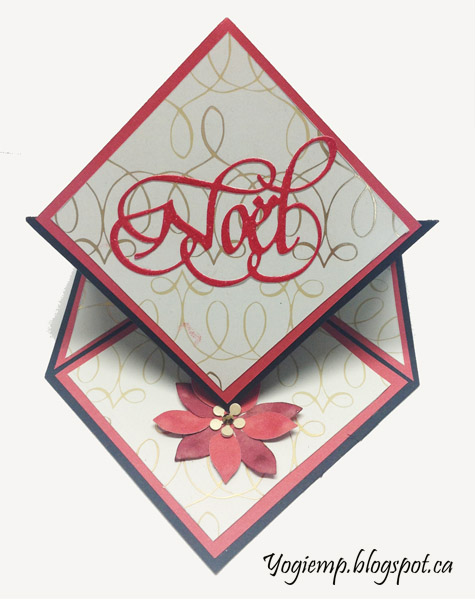
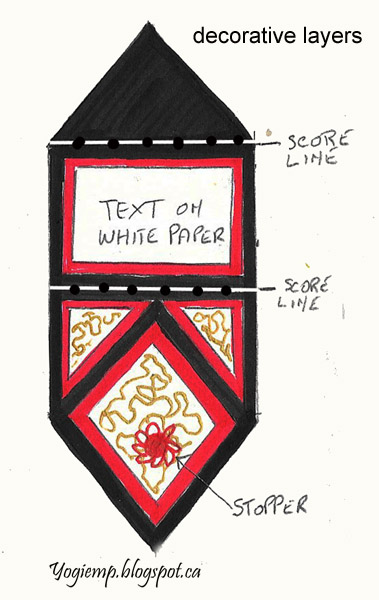
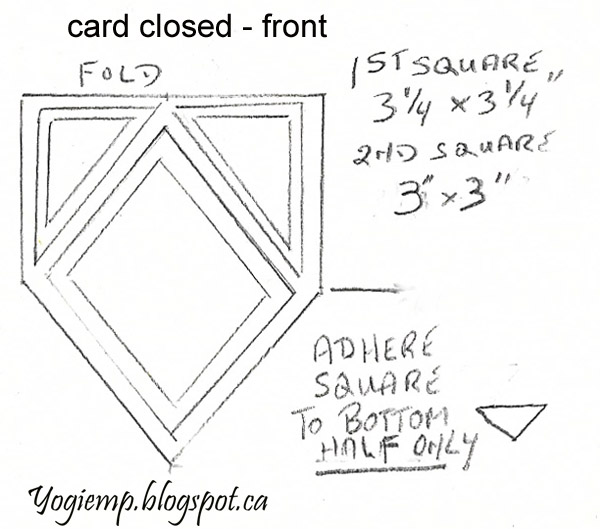
Then I made a more traditional one that's a square shape.
A lot easier.
I'm also getting to use decorative paper I've had sitting around for about 7 years.
Instructions at the
bottom of this post.