|
To begin, cut a bunch of squares - 2 of each size - from 1.5" to 8.5" in
increments of 1". Each side of the tree has 8 squares.
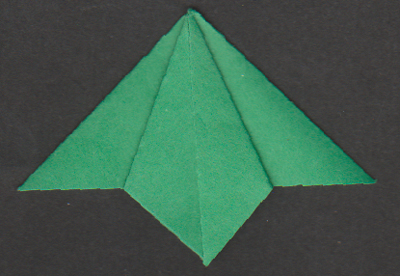
Fold all of the squares as directions for Tea Bag
Basic Triangle shape.
Cut a couple pieces of tracing paper or other scrap
paper to use as a mask for stamping the flourishes. Place masks under the flaps,
stamp the flourishes with Versafine Olympian Green, and clear emboss. Work one
tea bag triangle at a time. When flourishes have all been stamped, stamp the
snowflakes with Versafine Toffee and emboss with Queens Gold.
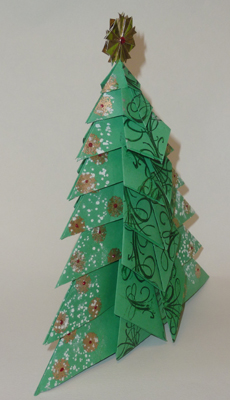
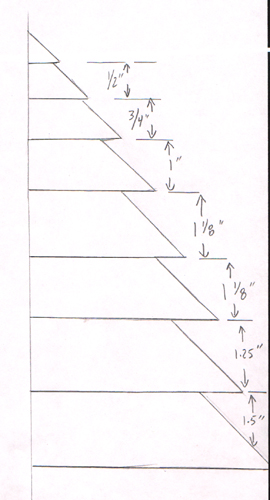
Assemble the tree. Put a dab of glue on the inside
of the 2nd largest tea bag triangle. Place the largest triangle inside the
opening and align the straight edges along the guidelines of a self healing
cutting mat with a separating distance of about 1.5". Put a dab of glue on the
3rd largest tea bag triangle, place the 2nd tea bag triangle in the opening and
align as above with a separating distance of about 1.25". The next two triangles
will have a separating distance of about 1-1/8". the next 3 will have separating
distances of approx 1", 3/4" & 1/2" respectively. (see spacing diagram
HERE).
Fold in bottom triangle legs s they don't interfere in the standing position.
|
Repeat with 2nd tree - tea bag triangles, using the
back of the first tree as a guide for spacing each exactly, so when both trees
are glued together they match up perfectly. Leave the top section a little loose
to slip the ornament in later.
|
|
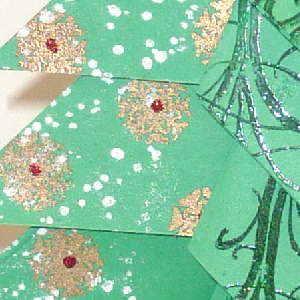
Rubber stamp using a speckle stamp of choice with Brilliance Silver (make sure
it's very juicy), along the edges on each side and emboss with Ranger's White
Embossing Puffs. You'll see the white puff up like snowflakes. As a final touch
add Stickles red to the centers of the gold snowflakes. set aside to dry.
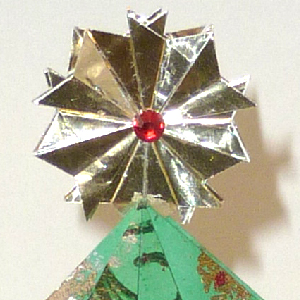
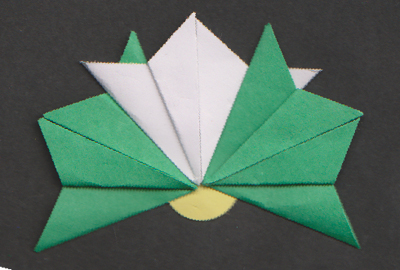
Make the tea bag top ornament. Cut 10 pieces of 1"
square gold foil paper. Note: this is a beautiful paper for tea bag folding, but
is totally unforgiving. So any wrong folds will be very visible - so take care.
Create 10 triangle shapes like the tree. Punch out a
small 1/2" circle from some plain copy paper. Put some double sided tape on one
side and start sticking the folded triangles, 5 for one side and 5 for the back
side.
2nd triangle sits butted up to one side of the
folded triangle legs. It creates a small v shape of the overlapping triangle
points. See placement diagram
HERE
|
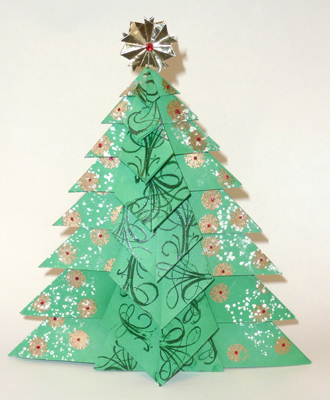
When first side is done, turn over,
place some double sided tape on the back side of circle and adhere the rest of
the triangles, matching the placement to the first side. Then put a dab of glue
in the triangle openings. Add a rhinestone on each side and adhere ornament
between the two trees with some glue.
|