Tim Holtz - Creative Chemistry 101 class - Challenge Week 2 - Days 4 - 6 - Hum of Bees

size: 5"w x 7"h

Created: June 9, 2016
Modified:

OK so I didn't read the challenge for week 1 sigh!!!. We were supposed to concentrate of Day 1 & 2 only. At least I did day 2. For week 2 Tim wants us to concentrate on Days 4 - 6 (re-inkers, stains/sprays, markers)

I used mainly stains for this card.


I scored and folded my white card.

Die cut the bees from white cardstock. For the top bee, inked the folder on the side that has the writing, using Distress Black Soot, ran through my machine, and embossed with Black detail embossing powder. Stained the whole bee with "Mustard Seed". Dried. Added some Victorian Velvet stain to the wings. Found it a bit too intense, so swiped my "Picket Fence" stain over the wings, dried and repeated and dried. Used "Ground Espresso" stain for the legs. Used part of another embossed image of the bees and fussy cut the antennae, coloring them with the espresso.

For the bottom bee. Applied the mustard seed stain on the folder (the side with no writing), ran through machine, dried. Hit the high points with and espresso pad. Used the Picket Fence on the wings as per the top bee. Dried. The swiped glue onto the wings with my finger and sprinkled with Stickles dry glitter "Diamond".

top bee

Bottom Bee

On a 
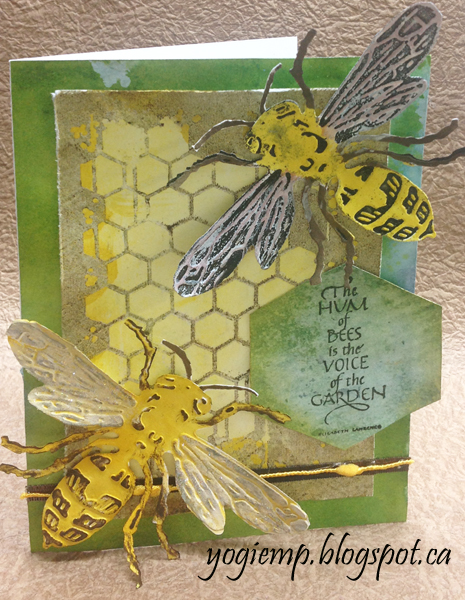
separate piece of white cardstock, created my background. Applied stains to my craft sheet ("Crushed Olive", "Shabby Shutters", "Mowed Lawn", "Broken China". Misted my cardstock on both sides, then swiped through the Distress stains. Misted some more and dried. Sponged some broken china around the edges. Adhered to card front edge to edge.

The beehive layer, inked the stencil (Memory Box) using the espresso pad, ran through my embossing machine and clear embossed. Misted with water and swished the Mustard Seed over the whole thing, misting a bit more, then blotting up the intense color from the center area. Sponged the edges with the espresso. Trimmed down and distressed the edges with Tim's distressing tool.

Adhered a piece of brownish ribbon, then a piece of yellow nubbed yarn.

When making the background piece, swiped anther piece of cardstock through the left over stains. Stamped the quote using the black soot and clear embossed. Cut it down in a hexagon shape. Found the background a bit intense, so misted with water and blotted of the excess color.


Return to TH Chemistry 101 or  

to  NittyGritty  Gallery

or to see Week 3 Challenge Day 8 - 9

Home Page Index
(text only)
Glass
Gallery
"And More"
Gallery