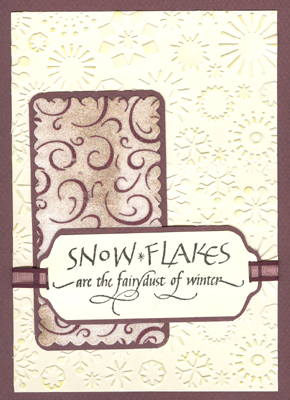
ID: Glitter "Snowflakes"
5"w x 7"h

Created: September 19, 2009
Modified: 
October 1, 2009

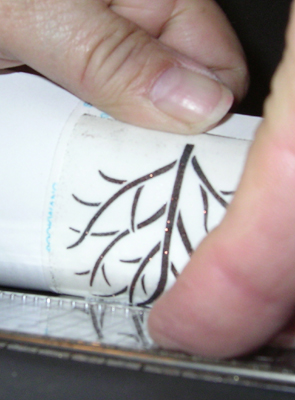
I tired several brass stencils and found that the more open and filigree the stencil the easier it was to distort when removing from the tape. So a simpler stencil with larger areas of solid brass is best.

Supplies:
Sookwang Tape 2.5"w
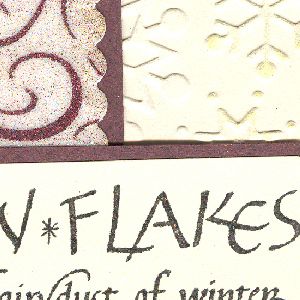
Glitter Ritz Micro Fine glitter - Merlot, Gold, Cool Highlights
Nestabilities: Long Classic Scallop Rectangle" #S4-143,
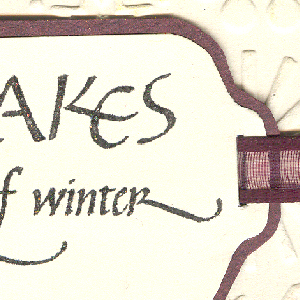
Rubber Stamps: Quietfire Design  "Snowflakes are"
Versafine stamp pad Black Onyx, Olympia Green
Embossing Powder Judikins "Psychedelic"
Brass Stencil Curliques #LJ855
Cuttlebug Embossing Folder "Snowflakes" #37-1140
Stamp Pad Opalite "Sterling Frost"
Ribbon
Cardstock


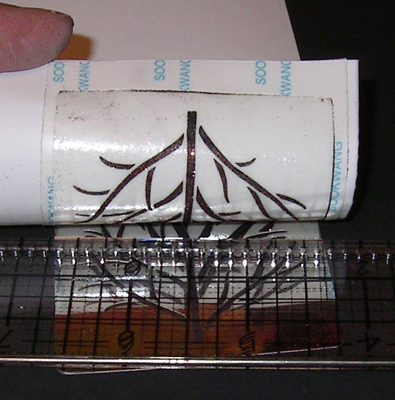
I put a strip of 2.5"w Sookwang tape onto a piece of white cardstock. and lay down my brass stencil (Lynell Harlow Curliques #LJ 855) and sprinkled Glitter Ritz micro fine glitter "Merlot".

REMOVING STENCIL FROM TAPE: This is the tricky part. see instructions and pics below.

The cardstock will tend to curl and may even have some of the layers of cardstock come away with the tape. No problem since you'll be adhering this to another piece of cardstock.

Now sprinkle the "Cool Highlights" over the remaining areas with a touch of gold. Blend and burnish well. Use the 4.25"h die from "Long Classic Scalloped rectangles" #S4-143 to cut out a section from your glitter art. Mount it to a piece of Brownish toned cardstock (I used Canson Mi-Tientes) and trim close to the scallop rounding the corners with a corner rounder. Set aside.

Run a piece of approx 5" x 7" cream toned cardstock through the Cuttlebug using the Snowflake embossing folder #37-1140.

Hint: put it in sideways, run through Cuttlebug, move cardstock and run through cuttlebug again.

Skim an Opalite "Sterling Frost" stamp pad over the raised design to give it a beautiful shimmer. Trim down to desired size and mount to card front (the brownish Mi-Tientes) leaving a little less than a 1/4" border all around. Position and adhere your glitter artwork.

I cut a small template of the curves I wanted for my tag, then drew my lines on the cream toned cardstock and cut out. Rubber stamped the quote (Quietfire Design) using Versafine Black Onyx and embossing with Judikins "Psychedelic". Mounted to the brownish cardstock and trimmed down. Cut a couple slots for my burgundy ribbon to pass through.

You can see some of the glitz in the rubber stamped quote and the shimmer in the snowflake embossed design in the detail pics at right.


REMOVING STENCIL FROM TAPE: The tape is very strong and there is a real resistance when you are removing it. Turn stencil down with paper facing up. Peel off the edge until you get the separation happening, then using the ruler to keep the stencil flat, pressing down on the ruler as you gently remove the paper. Keep moving the ruler so it's very close to the separation between paper and stencil until the paper is totally separated. It will curl, but that's OK, it will be adhered to another piece of cardstock later.


Return to Glitter Gallery or  to  NittyGritty  Gallery


Home Page Index
(text only)
Glass
Gallery
"And More"
Gallery