ID: 
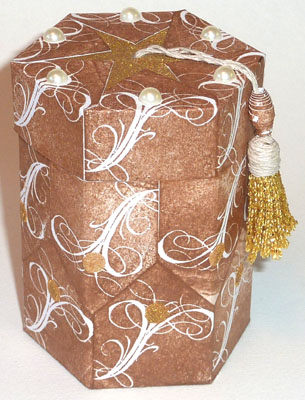
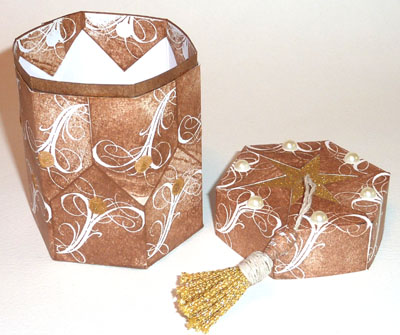
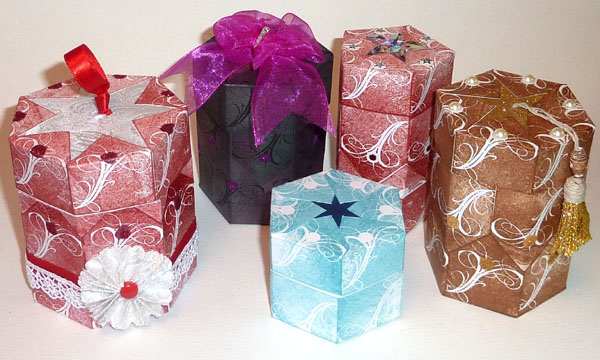
DT  Project - Flourish House Box (Brown)
Box Size with top: 2.75" x 2.5 x 3.5"h
 

Created: May 14, 2011
Modified:

SUPPLIES: (Note: most of the supplies can be found online at QuietfireDesign.ca (items in Pink)
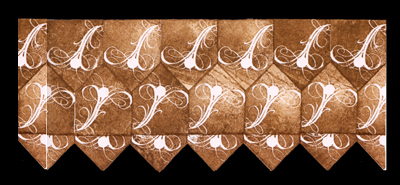
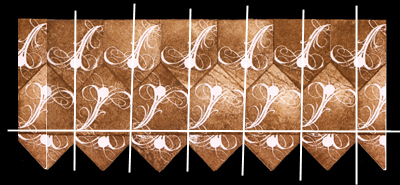
Cardstock white 2pcs 8.5" x 11"
Rubber Stamp - House from Flourish Flight set

Embossing powder gold
Heat Gun
Distress Stamp pads "Vintage Photo"
Ritz Micro Fine Glitter Gold
Glue Pen
Half Pearls
Handmade tassel & bead

Ruler or paper trimmer
Scor-it board

X-Acto knife
Bone folder
various sizes of Sookwang Tape,
(2.5" & 3/8")
 White Glue or
Glue stick


Fig a) This is one pattern option with the two rows of patterns masked and the bottom points stamped and
becoming the bottom of the box.

Fig b) white lines are your score lines 

Fig c) star shape for bottom of box. Inside line is your pencil line, outside line is your cut line.

INSTRUCTIONS:

I generally cut my stamp right to it's edges so I don't need a stamp positioner. But a stamp positioner can be helpful for those not as adept with eyeballing.

Note: depending on where you score to create your top & bottom, and where you score for your sides, as well as the number of house patterns you use, you will get umpteen variations. The star on top will become larger or smaller and will become different number of points options.

Starting at the top along the 8.5" side of your white cardstock, repeatedly stamp the Flourish House with the Vintage Photo stamp pad. Make sure you stamp right against each previous stamped image and you're stamping a straight line across. This can be "fudged" a bit by trimming off a sliver if needed.

Stamp your next row. (see "Fig a") Mask this row and stamp the points of the house as shown.

Cut out the 6 house pattern created as one strip and keep the little left over piece attached to join your strip later.

Score along the length of your strip on the picot edge a little below the point where the  houses join - approx 1/5". (See "Fig b") Fold each section, adhere the flap to the side of the first house and trim any excess overlaps.

Note: it you score above the point where the houses join, there will be open gaps. Scoring just below will give you a large star, scoring below where the dot of the flourish lands will give you a smaller star and a nicer top. See image at left.

Cut a 6 sided piece of cardstock to fit inside cover (see template HERE). Double check that it fits properly. Cover with Sookwang tape, trim off excess tape. Keep release paper on and place inside box, mark your star shape, then cut around the star (see fig "c") with an x-acto knife without cutting through your cardstock. Remove the star release paper and sprinkle with gold embossing powder. Heat set. Let cool then remove the rest of the release paper and insert in to bottom of box, press down flaps to adhere.

The top is made with one row of stamped houses, cut out as above. End flap adhered, 6 sided bottom cut out, bottom checked for size, covered with Sookwang and trimmed. This is where it changes a bit from the bottom of the box. Remove release paper and put inside cover, adhering each of the flaps. Press down well. Careful don't, get the star portion stuck to something... Sprinkle star shape with glitter and burnish. Dust off any excess glitter.

To do the lip that keeps the cover on the box: cut a strip of cardstock approx 1" h and 8.5"w. On this box, I used a left over piece of stamped houses, but on all my other boxes, I just used the white cardstock. Score at the same vertical points as the bottom of the box. Place a piece of 3/8" Sookwang tape right along the edge (bottom portion of strip), remove a bit of the release paper, and using the top edge of the tape on the strip align with the top inside edge of the box. Keep removing release paper and pressing it down till you get to the overlap piece. Put a bit of glue on that overlap piece and adhere. Trim if necessary.

PS It's better to make this strip snug rather than loose or your top won't fit on properly.

Decorate with half pearls. Put a bit of the Glue pen on the dots of the flourish ad add some glitter. Let dry, then brush off excess glitter. Punch a hole in the center of the top of the box, adhere the string for the tassel to the inside of the cover. I also covered the string ends on the inside of the cover with a decorative piece of cardstock.

Click on box image below to see details for these variations.

Here is the brown box with some other variations.  The box on the extreme left is a 7 sided box. The other reddish one is a 5 sided box, all the others are 6 sided. Variations also happen with the number of rows of houses in the pattern.  The small blue box in front only has 1 row for the top and 1 row for the bottom. If you look closely at all the boxes, you can see various patterns created as well.

Return to Flourish House Boxes Gallery or  to  NittyGritty  Gallery


Home Page Index
(text only)
Glass
Gallery
"And More"
Gallery