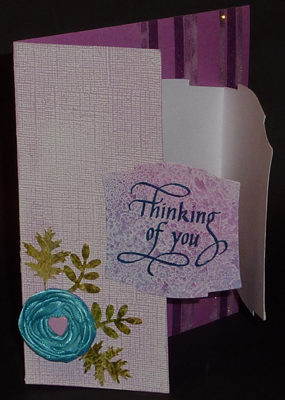
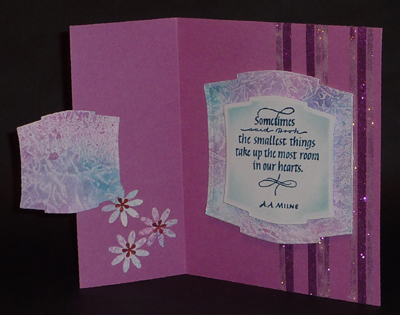
ID: DT May 2010 Pooh - Joy Fold
Card
Closed: 5"w x 6"h
Created: April 24, 2010
Modified:
SUPPLIES:
(Note: most of the supplies can be found online at
QuietfireDesign.ca
(items
in Pink)
White cardstock 1 sheet cut in half (see below)
and another small piece
Core'dinations Whitewash pack (Pale Pink/Fuchsia) 6"h x 7.5"w
Cardstock: small piece to match ribbon color 3" x 1.5" approx
Ecoline Inks (#361 Light Rose & #522 Turquoise Blue)
Waxed Paper about 10" x normal width
Iron
Perfect Pearls Blush & Turquoise
Mini Misters
Pipettes & tiny spoon
Distilled water
Teflon Mat (or other protection for sprays)
Hair dryer
Distress stamp pad (Broken China)
Clear Embossing Powder
Ranger's Sponging tool
Spellbinders
Labels Two
Die cutting/embossing machine
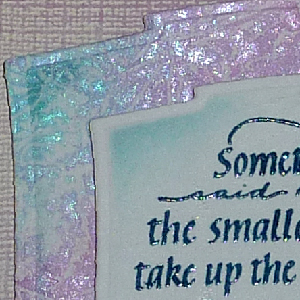
Rubber Stamps: "Sometimes Said Pooh...", "Thinking of You" small
Ritz micro fine Glitter (Rose, Warm Highlights)
Sookwang Double Sided Tape 3mm, 3/16" & 1.5"
Adhesive Foam Squares
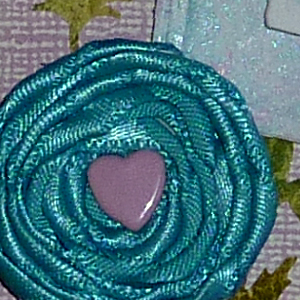
Brad - pink heart
Punches: medium & small daisy, various leaves
EK Success Orbis Circle Scissors
Aqua Toned silk ribbon 1/4" x 24" approx
sandpaper
C-Tru ruler (Tenths)
x-acto knife or fine scissors
Heat Gun
Glue Stick
Scor-It
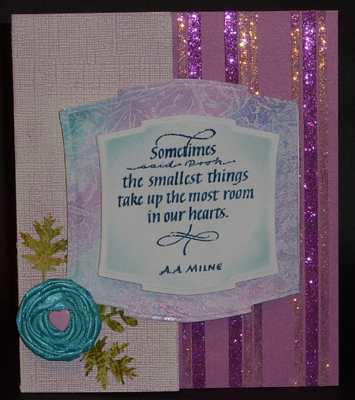
Sorry, the cardstock is definitely more rose
toned than purple toned. The rest of the colors are pretty
close, just a touch more pink in them and contrast.