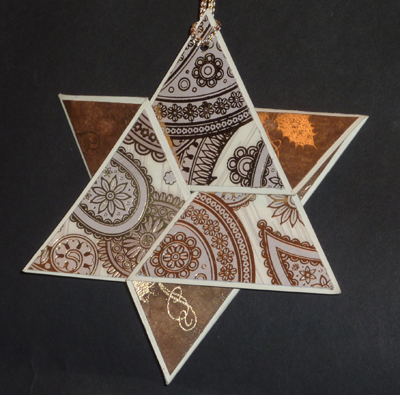
ID: DT Project - Star Fold -
Greetings card
Size Closed: 4"w x
5"h
Open: 8.25"w x 7.25"h
Created: July 2011
Modified:
SUPPLIES:
(Note: most of the supplies can be found online at
QuietfireDesign.ca (items
in Pink)
Off White Cardstock
Kanban cardstock (Bella Paisley
Chocolate)
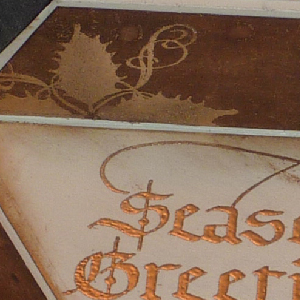
Stamp pad
Versafine Vintage
Sepia
Distress Stamp pads
Brushed
Corduroy,
Vintage Photo,
Walnut Stain
Sponging Tool
Rubber Stamp
"Have
a Holly Jolly Christmas", "Merry
Christmas Sentiments"
Gold Embossing Powder
Heat Gun
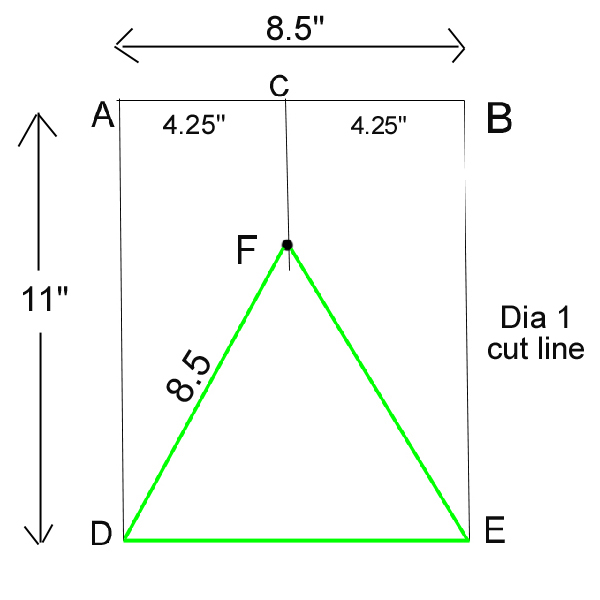
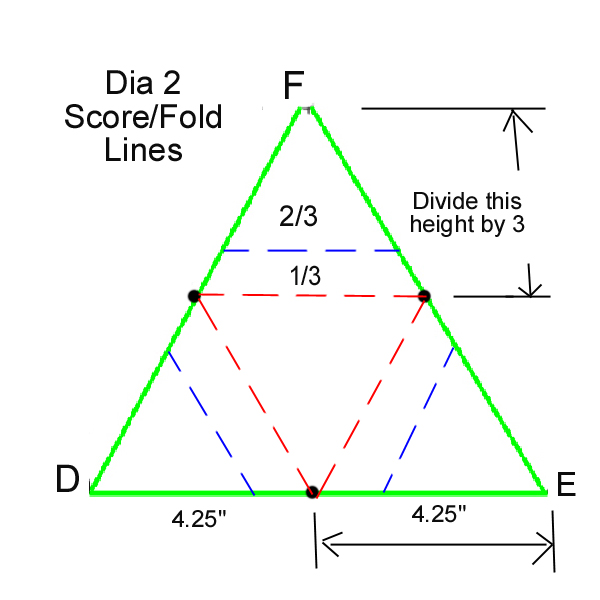
X-Acto knife
Bone folder
or
Scor-It
various adhesives
Sookwang Tape,
Glue stick
Scrap cardstock & tracing paper
Hole punch
Decorative ribbon or string