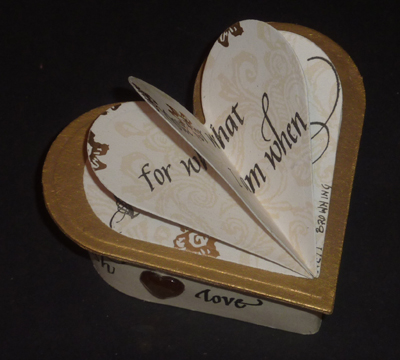
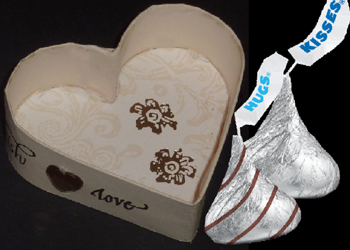
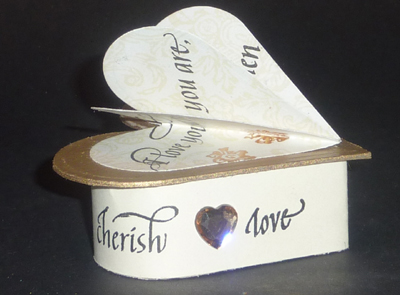
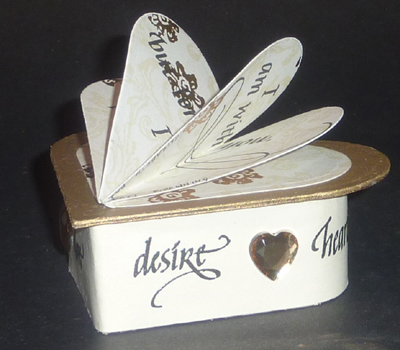
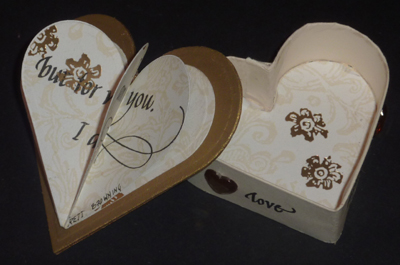
ID: DT  Project - Hugs & Kisses Box
Size: 3.75"w x 3.25"h x 2.5"d
 

Created: December 30, 2010
Modified:

SUPPLIES: (Note: most of the supplies can be found online at QuietfireDesign.ca (items in Pink)
Chipboard (1.5mm thick)
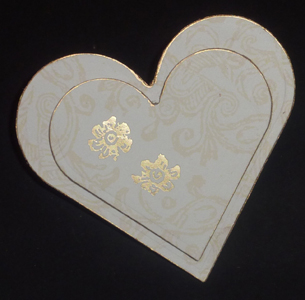
Decorative cardstock
(Fiskars Kimberly Poloson Foiled Cardstock "Blooming Love")
Cream toned cardstock 2"h x 10"w
Spellbinders Nestabilities "Classic Hearts"

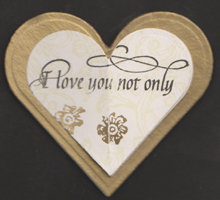
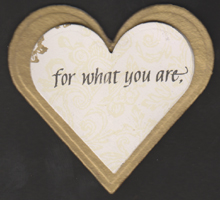
Versafine Black Onyx
Clear embossing powder
Lumiere Gold Paint
Krylon Gold Leafing pen
Rubber Stamp "I love you not only..." Life Journey Word set
Rhinestone amber hearts
Die Cutting Machine of choice Big Shot with clear plastic shims
X-Acto knife
Sharp scissors
Craft Sheet
Bone folder

Scor-It
Heat Gun

various adhesives Sookwang Tape, Glue Gun, Glue stick


INSTRUCTIONS:

Die cut 2 hearts - 4th size up (makes a 2.75"w heart) & 1 heart 5th size up (makes a 3.5"w heart) from the chipboard.

Note: Make sure you use extra pressure. The sandwich I used for my Big Shot was an A plate (white opaque), 2 B plates thinner clear ones, magnetic mat from Spellbinders, 6 plastic shims (Graffix Clear Craft plastic). You can just about see the cut coming through on the other side of the chipboard. Now just finish the cutting with an x-acto knife following the die cut impression. I wouldn't recommend this with intricate designs, but for hearts, stars, circles etc. works great.

While you have the dies out, also cut 8 small hearts and 1 larger heart from your decorative cardstock. Run 5 of the small hearts  back through the machine to emboss them - these will be for the quotation on top of the box. Set aside.

Note: there are several ways of putting the quote within the heart die cuts - either stamping first and then cutting, or cutting first and then stamping etc. Whatever is easier for you.

Cut a piece of the cream toned cardstock double the height of your box, plus the thickness of your chipboard. This one was 2"w x approx 9.5" long - gets trimmed to sized at the end. I scored and folded the height in half, bone folding to get a really good crease. I scored at about a 1/4" from one edge and cut away the outside folded portion (this makes the overlapping join thinner). I kept the folded piece closed with double sided tape along the length.

Do a mock wrap of this piece around the small heart and pencil in where the point of the heart lands, so you can position your stamped elements. I stamp them on some tracing paper, then tape them to the long piece and do another mock trial before actually stamping with the Versafine black. I also clear embossed them.


To keep the walls of the box straight while gluing, I use the second small heart and adhere, with removable tape, a couple pieces of stacked scrap foam core (or something that will give you height), and then adhere it to what will be the base of my box. I then start at the indentation of the heart, put a bead of hot glue along the edge of the bottom chipboard heart and immediately place the long piece against the glue, starting at the fold line of the 1/4" cut edge, holding it in place as it cures. I also place it on my craft work sheet so I know the long piece is flush with the bottom of the heart . Continue putting some hot glue along the edge and holding the long piece in place as it cures. When you meet up at the beginning, remove the top heart with the foam core, then trim the excess of the long piece off,  gluing the ends together so they meet neatly at the edge of the indentation.

Adhere  one of the small decorative cardstock hearts to the inside of the box, and another to the outside bottom of the box. Set aside.

Paint the top of the larger heart with gold paint. Adhere the larger heart cardstock to the underside and edge the heart with the gold pen. Adhere 1 small heart to one side of the other small chipboard heart, edging it with the gold pen. When all is dry, adhere the smaller heart to the larger heart with your glue of choice, centering it well. See pic at right.

Start stamping the quote, one line at a time within each of the dry embossed hearts, leaving the last heart empty for your own sentiment. See pics below. I hand printed the authors name.

Adhere one back side half heart to the backside of the next half heart until all hearts are attached, then adhere to box cover. You now have a little quote/sentiment booklet.

As a final touch add the large amber heart rhinestones as shown. 


Return to  NittyGritty  Gallery


Home Page Index
(text only)
Glass
Gallery
"And More"
Gallery