Non 
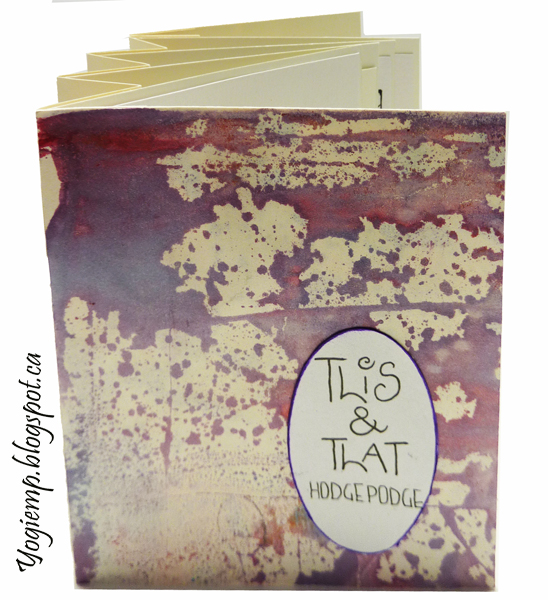
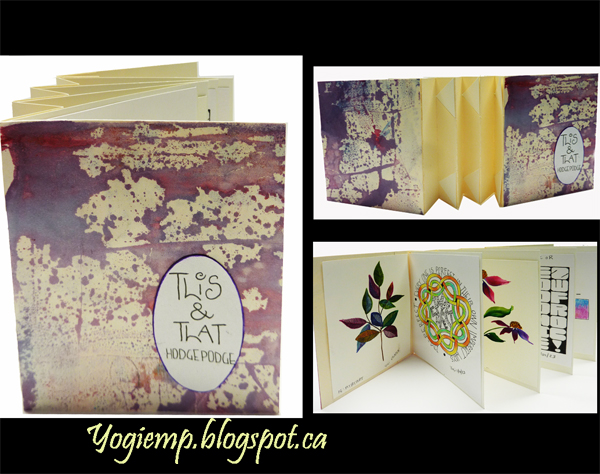
Adhesive Binding - This & That - Hodgepodge
size: 4"w x 5"h x 1/2"thk

Created: December 17, 2023
Modified:

Our next challenge for our Art Of The Fold Group had a couple options for our next meeting in January. One of our members kindly gave us the instructions on creating this Non Adhesive Binding. I'm pretty sure I've made it before but I guess it was eons ago...

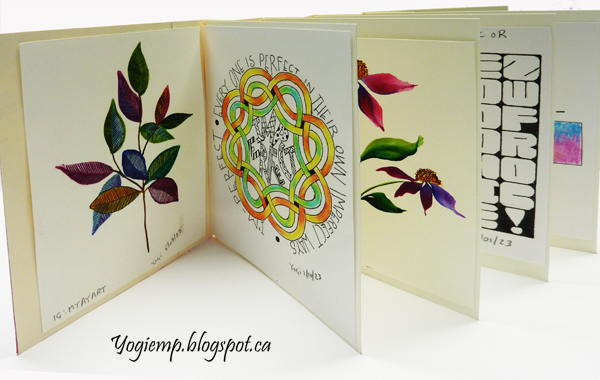
I used Strathmore Bristol cardstock for the 4 insertible pages. Staples cream cardstock for the spine and covers then covered the covers with some geli print paper I recently made. Added the title using a Zig Writer on misc cardstock, die cut with Spellbinder's oval die set, added a bead of purple Zig Writer around the edge and adhered to cover.

I adhered the images to the removable pages. Misc small artwork that has a tendency to get lost... Hence the "Hodgepodge" title


Instructions: cut 4 pages 4"w x 5"h. 
Cut slits in pages: At 1" from left edge (front of page) and 3/4" from top and bottom edges place a pinhole at each point. Cut a slit from pinhole to top and bottom of left corner edge. Set pages aside.

Spine: Cut 1 spine 5"h x 10"w. Fold the spine into 10 equal sections (1" each fold). Inside of spine facing you, (Odd folds are valley folds. Even folds are mountain folds). At 1st, 3rd, 5th & 7th fold line from left edge - insert a pin hole at 1.5" from top and bottom edges. At  2nd, 4th, 6h and 8th folds from left edge - insert a pin hole at 3/4" from top and bottom edges. Cut a slit between these 2 pin holes.

Insert pages into the slits created in spine. Add covers if desired. (note: I adhered the 9th fold section carefully to the 8th fold section without interfering with the slits.)

I adhered my artwork being careful to avoid my slit areas.


Please use your back button for previous pages.
Should you wish to go back to the Art Of The Fold Gallery  please click on the home button below.

or the

Journals Gallery 

Home Page Index
(text only)
Glass
Gallery
"And More"
Gallery