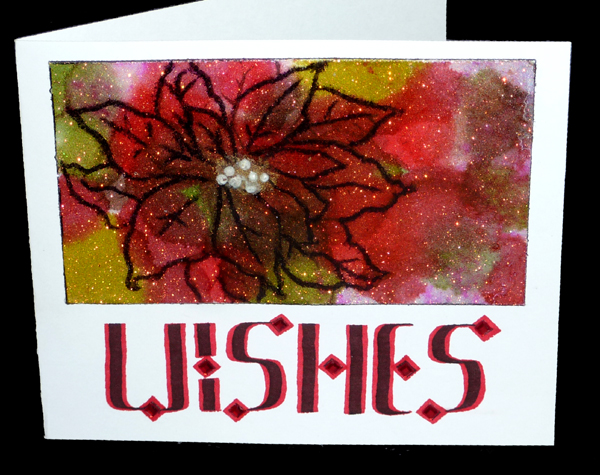
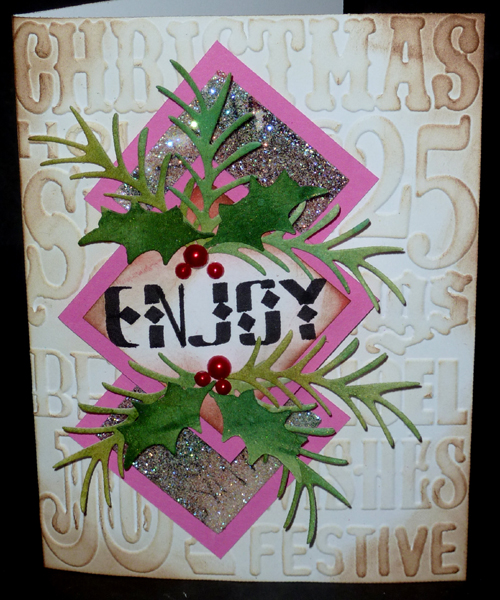
ID: Glitter & AI - Wishes
Size: 5.5"w x 4.25"h

ID: Glitter Sampler
 

Created: August 18, 2012
Modified:


I'm going to a play day with friends on Monday and one of the ladies asked me to demo my glitter with Ecoline ink technique I used on some previous cards. I said sure... So decided to play with my glitter again. BIG GRIN.

All the cards unless noted use Glitter Ritz micro fine "Warm Highlights" glitter applied to Sookwang tape on 110# white cardstock.

On the inside, each card has a different Xmas quote or sentiment stamp from Quietfire Design  

I dribbled Adirondack Alcohol inks, various greens & reds, and some blender solution, let dry and stamped the poinsettia (Flourishes set#37) using Versafine Black Onyx. Went over the lines with a black Identi pen. Added white dots with Rangers Enamel Accents, dried then applied Perfect Medium and clear embossed with UTEE. Edged the piece with the Identi pen.

Adhered it to a white side folded card and wrote in my word "Wishes" with a thick broad edged red marker, then went over it with a narrower black marker. Added red square rhinestones.


ID: Glitter & Ecoline - Noel
Size: 4.25"w x 5.5"h

I stamped the poinsettia (Stubby Stampers "Giant Poinsettia") with Versafine Black Onyx and colored with the Ecoline inks. The ink spreads very quickly, so only put a minute amount on the tip of your brush and have a heat gun handy to stop the migration. You can use a damp brush to move color in areas you don't want color and blot with a dry paper towel, much like lifting color with watercolors.

Used Liquid Pearls "Buttercup" on the centers, let dry and dotted them with the Identi pen. Adhered to a red and deep green cardstock.

Embossed my card front with a Cuttlebug "Kassie's Brocade" embossing folder, then adhered my various elements.

Wrote the word "Noel" on a separate piece of white cardstock with the black broad edged marker. Added some quickie glue to the diamond centers and then red Ritz micro fine glitter. Cut the end into points and adhered to card.

I stamped the poinsettia (Stubby Stampers "Giant Poinsettia") with Versafine Black Onyx and colored with the Tombows watercolor pens. NOTE: The ink does not spread as much as with the Ecoline inks.

Used Liquid Pearls "Buttercup" on the centers, let dry and dotted them with the Identi pen. Adhered to a deep green and red cardstock with a tartan ribbon between the layers.

Embossed my card front with a Cuttlebug "Holly Ribbons" embossing folder, then adhered my various elements.

Wrote the word "Joy" on a separate piece of white cardstock with the black broad edged marker. Added some quickie glue to the diamond centers and then gold Ritz micro fine glitter. Die cut with a fat Spellbinders oval die, sponged some Red around the edges and adhered with 3D foam tape.


ID: Glitter & Tombows - Joy
Size: 4.25"w x 5.5"h 


ID: Glitter & S Noir - Poinsettia
Size: 4.25"w x 5.5"h

I stamped the poinsettia (Stubby Stampers "Giant Poinsettia") with Distress Black Soot and colored with the Spectrum Noir alcohol inks.

Embossed my card front with a Cuttlebug "Swiss Dots" embossing folder, then adhered my glitter piece to a black textured cardstock then to my card front.

Don't ask... what a fiasco with the word I wrote and fixed up in my photo editing program. Sheesh... First I wrote part of my word missing the "n" so had the word "poise" when I realized it. So scratch, Scratch, to remove the ink etc and over wrote the letters correctly or so I thought... Took my pics of the card and saving the file and realized I forgot to put the 2nd "t" - sheesh again, so in the photo editing, I just copied and pasted my letters shifting them over to fit the extra "t". Now to figure out how to correct it in real life... Wrote the word using a pointed pen and Sumi ink.


Since not everyone has Micro Fine glitter, thought I'd try it with Ultra Fine glitter instead. Will work as far as coloring goes, but not great for a stamped image. So obliterated the image I stamped and added more inks. Cut the piece into squares and layered onto bright pink squares.

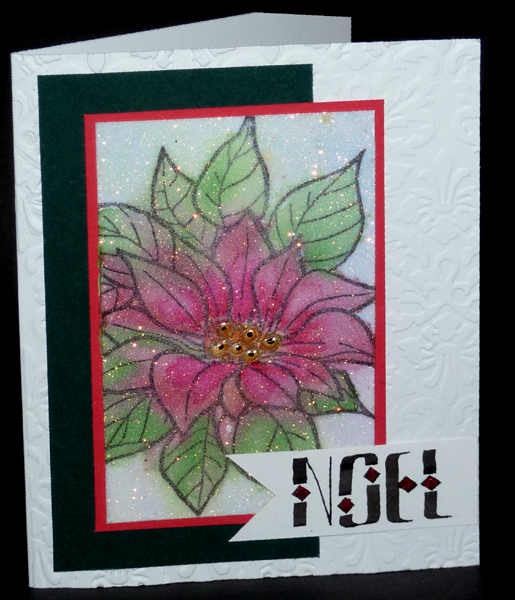
Embossed the card front with a Sizzix "Holiday Orint" embossing folder. Sponged some Distress Gathered Twigs around the edges and adhered my two glitter squares - offset.

Wrote my word "Enjoy" with the black broad edged pen, cut into a square, sponged some red and brown around edges and adhered to the pink square then onto card front with 3D foam tape.

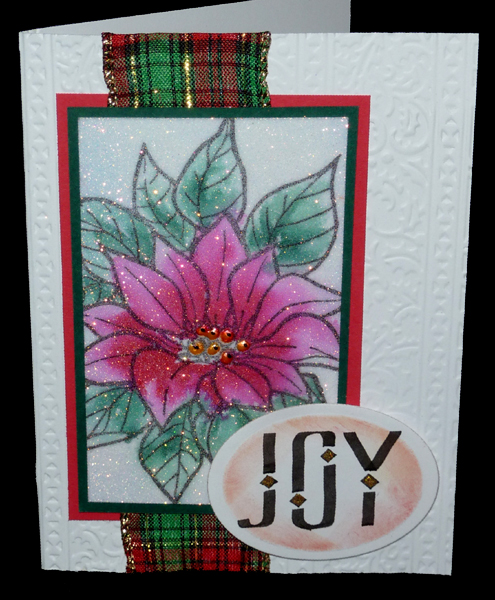
Die cut the pine bough sprigs (Cheery Lynn) from some green decorated paper from my stash. Die cut the holly leaf (Sizzix Tim's Movers & Shapers mini "Pine Tree" set). Added a bit more green to those leaves and adhered both to card front adding two sizes of red half pearls.


ID: Glitter & Ecoline - Enjoy
Size: 4.25"w x 5.5"h 


ID: Glitter & WC - Blessed
Size: 4.25"w x 5.5"h

I had die cut a bunch of Memory Box Madison Windows small a while back and these two cards use those cut outs. This one has an iridescent/holographic embossing powder and has tones of blue and greens in it depending how it hits the light. The one below was a stamped embossed image and then sponged with Distress, I remember making it a couple years ago...

The cardinal images are cut out of one stamped image (Heartfelt Creations "Cardinal Pine Bough border set"), stamped with the Versafine and colored with real watercolors (Daniel Smith) and a damp waterbrush.

The background is embossed with Sizzix Tim's Distressed Brickwork embossing folder.


Window & cardinal explained above.

Card front stamped with Impression Obsession CAC Holly using Distress Bundles Sage and clear embossing on cream toned cardstock

Ribbon and bow adhered, then window.

Stamped the sentiment onto shrink plastic, die cut with Spellbinders Lacey Circles, sponged with Distress red and shrunk, then tied to bow with twine.


ID: Glitter & WC - Season's Greetings
Size: 5.5"w x 4.25"h 

Please use your back button for previous images or should you wish to go to the Hand Painted More Cards Gallery  or More Cards 2 Gallery please click on one of the links below.

More_Cards Gallery or More_Cards2 Gallery  or More_Cards 2010 Gallery or More_Cards 2011 Gallery

or click the Home button to go to the More Cards 2012 Gallery


Home Page Index
(text only)
Glass
Gallery
"And More"
Gallery