ID: VSN March 10 - Happy Birthday - Frame Light Tomorrow
5"w
 x 7"h

Created: March 15, 2010
Modified:
This is another submission for the Vamp Stamp Magazine for the May 2010 issue with the theme of "Ribbons".

It's a stand alone birthday ornamental piece which is attached to the card with magnets and the ribbon bow.

It didn't land in the magazine but in the private online gallery.


Die cut 6 Spellbinder's Polka Dot Frame #S5-016 from white cardstock using the Cuttlebug (keep one of the drop out rectangles). Run through again to emboss each. With the Sofft tool or sponge, lightly apply the Pan Pastels (Bright Yellow Green #680, Phthalo Green #620) yellow green all over, then apply the Phthalo in some areas and hit the high points of the polka dots. Use the dried baby wipe (Costco brand) to blend color and remove excess. Do this on the right side of all 6 frames. Fold 5 of the frames in half (right side to right side), reserving one frame for the card.

To make your paper beads, cut a triangle approx 1/2" to 1"w at one end and approx 6 " long. Put paper in slot of tool (Bead maker http://www.xmission.com/~wa7jos/C-5/PaperBead/) and start rolling. Put a dab of PVA at the end and continue rolling between fingers till glue is dry. Remove from tool. Make them in various widths and lengths without making them too thick.

Cut your waxed linen thread into 4 equal pieces of about 7" each. You need 4" for the open window frame area and the rest will be for knotting. Make a single knot at one end. String your beads, putting a knot (or knots) at points you want your beads to land, or else they'll all fall to the bottom of the string. Put a good dab of PVA glue on the wrong side of a frame - this will be the top. Press your finger on the glue/knot area, working the glue into the knot. Put a knot at the bottom of the string in an area that it will fall within the bottom frame border. Put PVA at that point and again with finger, work glue into knot. The knots will help prevent the string from being pulled loose. Put either PVA and rub with finger to cover all areas or use a glue stick. Do this on half the frame - wrong side - that you just glued the string to. Adhere it to the wrong side of another half frame, matching the fold lines and edges. Continue 3 more times to string beads, glue to wrong side of a half frame, when dry, adhere to another half frame. Cut 4 small strips of the magnet (approx 1/4" x 1.5" ea) and adhere to the top and bottom of the last 2 half frames to keep them closed. You should have a free standing bead holder now.

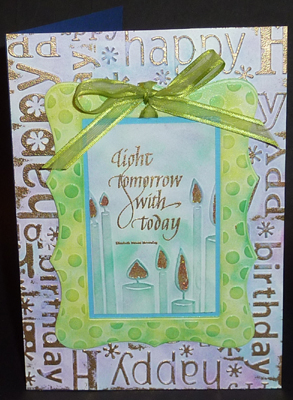
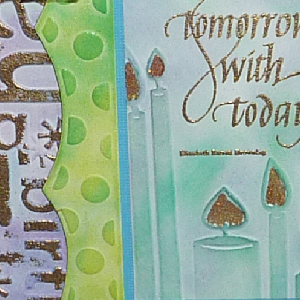
Run a 5"w x 7"h piece of the white cardstock through the Cuttlebug with the Happy Birthday (#37-1133) folder, keeping left edge flush. Turn your cardstock and place in folder again - flush to the right edge, and through machine - but just shy of where the other embossing ends. Now you should have embossing the full length of the cardstock along the left side with the right side unembossed. Place the unembossed section into the folder until your left edge hits the previous embossed area. Press and hold the folder closed, and with the rubber mallet, gently, but with some pressure, hammer the folder where you want embossing. Too little pressure with the mallet and you won't get an impression, too much and your cardstock will tear. Experiment on a scrap piece till you get the feel of what's needed. Also do the hammering where there is a table leg, rather than in the center of your table - too much bounce there. Turn your paper around and continue as above on the last unembossed area. You now have a 5 x 7 front embossed from a 4 x 5 embossing folder.

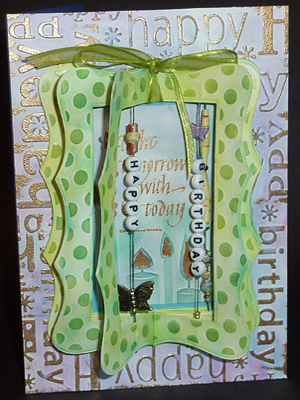
Color the Happy Birthday cardstock with the Pan pastels, Magenta & the 2 blues (Magenta #430, Turquoise #580, Ultramarine Blue #520), using the sponges, then blend with the baby wipes. Run the brayer over the high points with the Perfect Medium and emboss with the Queen's Gold. Missing some areas and getting some in unwanted areas adds character.

Rubber stamp the quote with the toffee and emboss with the gold in the upper section of the drop out piece from step 1. Trim this piece down by about 1/5" on top and one side. Using the mallet again, selectively emboss the candles (Birthday Wishes #37-1162) around the quote. Sponge some of the Phthalo and blue and blend with the baby wipe. Use the glue pen and sprinkle on some gold and orange glitter Ritz micro fine glitter to mimic the flame color. Mount this to a blue textured cardstock, then to the back of the reserved frame. Cut another 2 pieces of magnet, same size as above and adhere to bottom wrong side of frame. Put foam tape along edges and adhere to happy birthday cardstock.

side view


Score, fold and trim dark blue cardstock to make a 5'w x 7"h side fold card. Adhere the birthday assembly. Cut a slit in the top section, at the bottom edge of the frame through all layers. Cut another slit through the card but not the frame, but just at the point of the frame. Thread the ribbon (approx 14") through the slits. Tie the ribbon around the bead frame assembly. The magnets at the bottom will help keep the frame in place.


To go to the And More Gallery for hand made greeting cards please click the link below.

More Cards Gallery

Please use your back button for previous pages or should you wish to go to VSN Gallery  please click the home button

or the Misc Challenges Gallery to see other challenges


Home Page Index
(text only)
Glass
Gallery
"And More"
Gallery