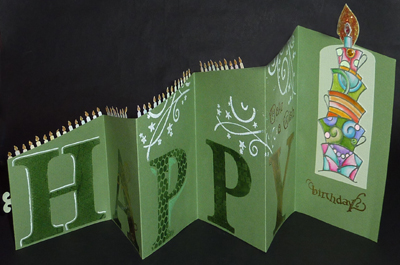
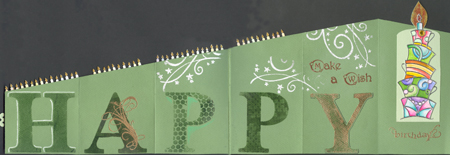
ID: VSN March 10 - Happy Birthday
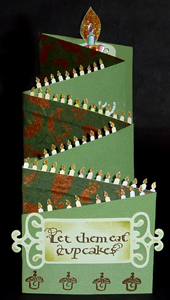
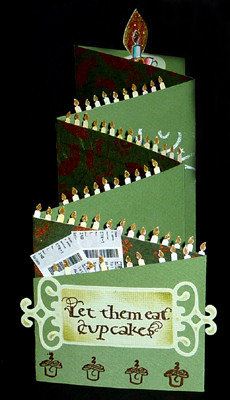
 - Eat Cupcakes
4"w
 x 7"h (opens to 21")

Created: March 15, 2010
Modified:
This is my submission for the Vamp Stamp Magazine for the May 2010 issue with the theme of "Birthday".

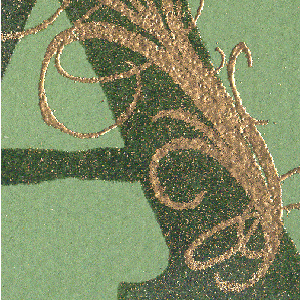
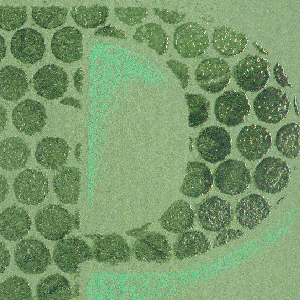
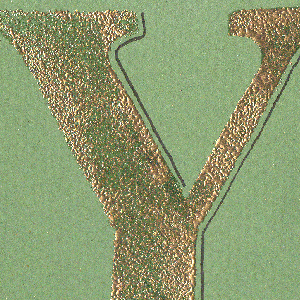
Score & fold a 7"h x 25" green cardstock starting with a 1/2" fold for a tab, then every 3.5" to create an accordion folded card. You should end up with 7 pages plus the tab. Open it up to lay flat and cut on the diagonal with the small end being 4.25"h (this is the tab end) and the high end being 7"h. Fold the last two pages together and draw a light line onto the last page using the previous page as a guide. Cut off the top section so when card is folded closed, the last page is the same as the previous page.


Rubber stamping the large letters (Words & Craafts - Magnetic Alphabet Big Letter set Upper Case) - one on each page starting with the 2nd page.


H - Stamped with Versafine green, clear embossed and outlined with the Inkssential pen.
A - Same as H, then overstamped with the small flourish using Perfect Medium pad and embossed with Gold.
P - Place punchinella over your stamp (solid image stamps work best) and ink the stamp through the pattern. Works best with small stamp pads or the tip of larger ones. Clear emboss. Add a touch of colored pencil shading.
P - Ink stamp with the green, then stamp onto the stamp with the uninked checkerboard stamp (some ink will be removed by this procedure and you should see your checkerboard pattern), stamp onto card and clear emboss.
Y - Stamp with the green, clear emboss, then reink the stamp, trying to ink only the edges and emboss with the gold. It will give a distressed look. Shadow outline with black pen.


Rubber stamp the words "Make a Wish" (Faerie Song FS1maw) with Versafine Toffee and emboss with Queen's Gold. Rubber stamp sections of the Fancy Pants large flourish design (Blissful Seasons set #773) with the perfect medium and Emboss with white (careful where you place the stamping on the 2nd "P" page so it doesn't show when card is closed).
 

Place Peel offs (ECraftDesigns Cakes Silver #2478) onto watercolor paper, cutting and stacking them to get the height you want. I used 3 different cake piles from the sheet. Then color with Tombows, lightly moisten the paper, so when you add the color it will start to bleed and is easier to continue moving the color to get nice blends. Do the same with the gel pens. Note, the gel pens when dry can not be moved again, they are permanent. Cut out around images and adhere to the minty green cardstock. Cut this in the shape of a candle including a flame, and adhere to last page of main card. Add some Quickie glue to the flame and add glitter. Embellish with some faux rhinestones.

Rubber stamp the word "Birthday" (Quietfire Design) under the large candle with Toffee and gold emboss.

Punch out strips of candles, trim the base area to about 1/4" and adhere to back of card pages. Note if you count all the candles I used, it's good for a 60th birthday or just as a bunch of candles. Cut decorative mulberry paper to approx 2" on high end & 3/4" on small end & 3.5" long so that it will cover the base of the candles and be a decorative element on the card.

Adhere 1st page to back of 2nd page using a thin piece of double sided tape on the 1/2" folded flap and at the bottom to create a pocket. Handy to insert a gift certificate or coupon, or in my case shrunken ballet tickets (see top of page).

Stamp the words "let them eat.." (Quietfire Design) with Toffee, gold emboss, die cut with the fancy label and sponge edges with Distress green. Adhere to card. Stamp the cupcakes (Quietfire Design) in a row at the bottom with Toffee and clear emboss.

To go to the And More Gallery for hand made greeting cards please click the link below.

More Cards Gallery

Please use your back button for previous pages or should you wish to go to VSN Gallery  please click the home button

or the Misc Challenges Gallery to see other challenges


Home Page Index
(text only)
Glass
Gallery
"And More"
Gallery