ID: MC Apr/18 - 3D - ECD Friends - Always Believe - HB card
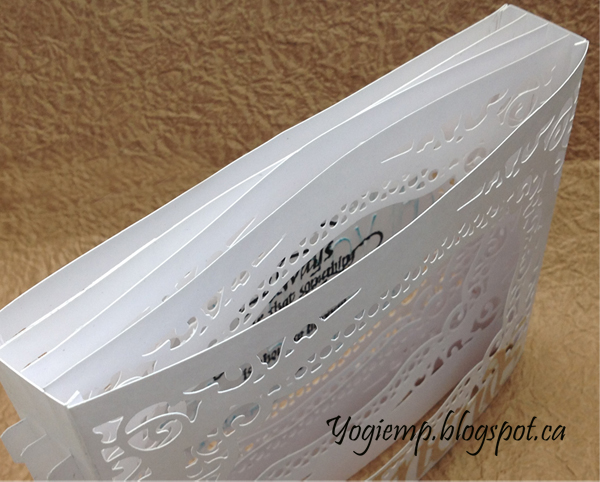
size: 7.5"w x 5"H (card laying flat)

Created: April 8, 2018
Modified:

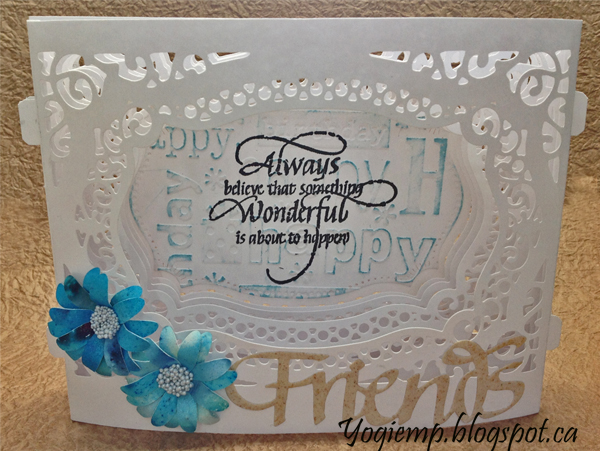
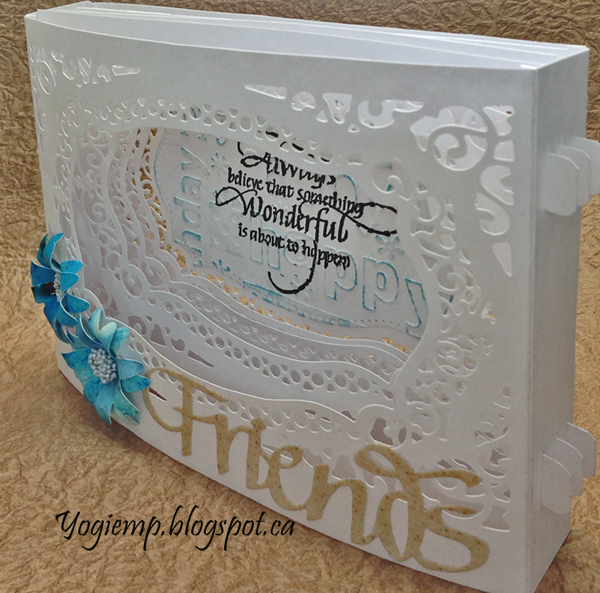
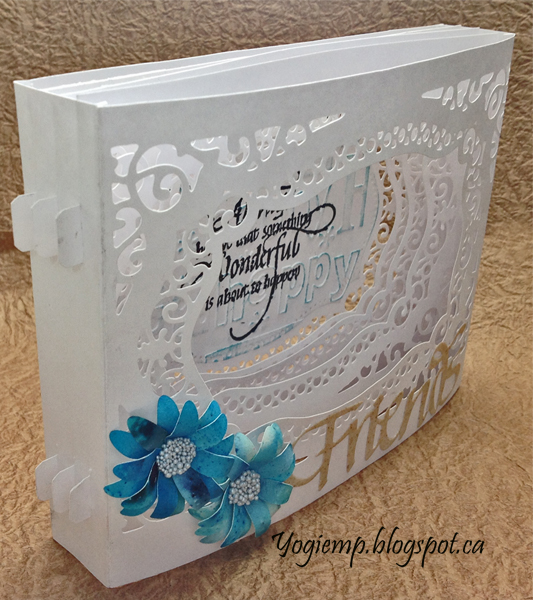
Becca Feecan came out with some really nice Spellbinder's die sets to create 3D Vignettes. Sorry Becca I don't have any of those dies yet...

I gave the all white one to a friend recently who was celebrating her 80th birthday... and one of my other friends there asked me to make one for her too... also in white, but since I'm adverse to making the same things, I added a touch of color to this one. I so love tht the card lies flat...

And I just received a bunch of goodies from Amazon.ca - Spellbinder's  Majestic Labels 25. Another beautiful die set... and I thought it would be perfect to create the 3D card for her. I'm using the same principles as Becca's. You can see the all white one I made HERE

I'm using an A Way With Words dies  "Friends" from Elizabeth Craft Designs, also available on Quietfire Design HERE

I'm also using a quote stamp from Quietfire Design which I love...

("Always Believe...")


The largest die in the set doesn't cut an outside edge which is the type of die best suited to creating these types of cards. Cut 5 layers from white cardstock using the largest die.

Place the next largest die from the set that also doesn't have an outside cut edge centered in one of the above die cuts. Run through your machine and use this as a template to position the die for the next 3 layers. (PS the 5th die cut is for the back and doesn't get the die cut opening), (PPS keep the drop outs - one for the last layer and the rest for other cards...)

Took 3 of the die cuts, stacking them and taping them together so they wouldn't move when I trimmed them down, (I left approx a 1/16 to 1/8" border on the left and right sides of the fancy cut outs, plus the 1/2 tabs). Untapped them. Used one of these trimmed pieces to cut my front and back pieces - minus the tabs

I cut my 2 vertical side pieces at one time so they would be exactly the same... the height of the card by 1.5"w. This gave me a 1/4 on either side to attach to my front and back pieces. And 3 slots at 1/4 apart. Scored and burnished the folds.

I cut little off cuts of my tabs as well as a small slit so the tabs don't fall out.

You can watch Becca's assembly video HERE


I dry embossed one of those drop out pieces using Cuttlebug "Happy Birthday" embossing folder. Lightly hit the high points with A distress "Broken China" pad. Dried thoroughly. Used my Tim's Spain Platform to stamp the quote. Stamped the quote using Versafine Black Onyx a couple times to get into the crevices and clear embossed. Used one of the other layers to position this die cut exactly right...

Die cut the "Friends" from white cardstock, inked with the Versamark and embossed with Emerald Creek Baked Textures "Vintage Beeswax" embossing powder. Adhered to front.

I raided my flower stash and picked these blue flowers which had a bunch of Prills in their centers.

Assembled all the layers.

Please use your back button for previous pages or should you wish to go to the rainbow Maker 2018 Gallery please click on

or to go to the Misc Challenges Card Gallery 2017 click HERE

or to go to the previous Misc Challenges Card Gallery click HERE

or  And More Gallery for other hand made greeting cards please click the link below.

More Cards Gallery


Home Page Index
(text only)
Glass
Gallery
"And More"
Gallery