|
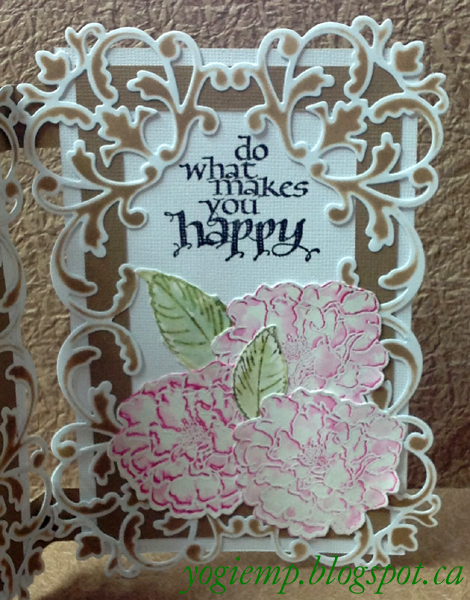
I die cut 3 frames (Cuttlebug - Anna
Griffins "Flourish Emblem") from 110# white cardstock. Sponged
Distress "Brushed Corduroy" all over then removed the die. Cut away
the center filigree part, marching the contours of the die cut.
Cut three 1/2" wide
frames from deep brown textured cardstock. Outside dimension 3.75"w
x 6"h. Adhered them to white textured cardstock and used the
"Perfect Layers" Ruler to cut a 1/4" border all around. Adhered it
to the back of the filigree die cuts, centering it and then using it
to center the other two panels.
eCut the Happy Birthday,
inserting 1 letter at a time on my mat and then welding them
together. Cut from white cardstock, and while on the mat, sponged
Distress "Picked Raspberry" on the top portion of the letters and
"Crushed Olive" on the lower portion, blending the two colors
together. eCut a shadow layer and sponged with the Corduroy. Adhered
the two parts together, then adhered the very bottom edge to the
back of the filigree.
Cut 6 rectangles from the
brown textured cardstock approx .75" x 1.75" to use as hinges. Place
two panels together, having the design just touching each other (not
overlapping) and making sure your bottoms are even, then glue the
hinge to the back of the solid white piece only of the card panel.
Fold one panel on to the other panel, adjusting while you're folding
so the two layers match up evenly. Then add the third page in the
same way.
I calligraphed the words
on the front using a 2.4mm Parallel pen and Sumi ink for the
Blackletter style word and a pointed pen with Sumi ink for the rest.
Added some pink Stickles to the heart. (this is where you journal
some text or find an appropriate stamp...
The carnations (Paper
Carnations) are made from white tissue paper, 6 pieces
layered and die cut with Sizzix (Tim Holtz movers & shapers mini
"Tattered Flower") die. Separated the layers and lay them on a piece
of white copy paper, brushed each with a wet paint brush and touched
each petal with a wet brush and some Raspberry from my craft mat,
then hit the very edge with a Distress Raspberry marker (brush
side). Allowed it to dry. removed from copy paper. Used a bone
folder to put lines on each petal and shaped the petals a bit.
Folded two of the layers (separately) in half, then half again,
pinched the bottom and set aside. Put a dab of glue on the center of
one of the layers, adhered the next and continued until the 4
layers were adhered. Put a larger glob of glue in the center and
adhered the two folded/pinched parts. When dry, fluffed and shaped
the flower. |

For the buds, used two
folded parts glued together. Die cut a five petal floret for the
calyx (eCraft Designs "Bunch of Flowers #728" the middle size)
from white cardstock, sponged with greens on both sides, punched a
1/16" hole in the center. Folded over one end of green wire
thread (Prima) approx 1/8" over (this will help prevent the blooms
from slipping away from the stem) and slipped the other end
through the leaf/calyx hole. Used a glue gun to adhere the tissue
blossom to the wire thread, shaping the bottom to keep it snug
around the wire, pushing up and placing the green calyx up to the
bottom of the blossom and continuing to shape. This should all be
done relatively quickly while the hot glue is malleable...
Adhered my blooms to the
card front layer. Added some quilled leaves (any elongated die cut
leaf will work). Added the half pearls - various iridescent pinks
and white. |