ID: MC April 11 - PC Flower - Thinking of You card
5"w x 7"h

Created: April 2, 2011
Modified:


If you've seen some of my recent cards, you'll know I've been playing with Air Dry Polymer Clay by Lumina. Still loving the stuff. The large flower on the right side bottom is done with it.

This card also uses a Thinking of You sentiment and the Small Flourish by Quietfire Design

Flower: I used Hero Arts Striped Flower, dusted a petal with some powder and pressed my polymer clay into it, then popped it out. Shaped it a bit and draped it over a small cylinder to dry. Did 5 petals this way (only using 3 of the petal shapes  on the rubber stamp). When dry, I used the lightest pink toned Tombow near the center of the flower and then blended it a bit with water. Stuck them into a blob of Fabric Tac. Smeared a bit of Stickles "Picket Fence" on the edges.

PS: I used the Fabric Tac, because of a pleasant booboo... I had put the container in a drawer, and since it was too high for the drawer, I laid it on it's side. It was tightly closed... When I went in to the drawer a couple months later there was the glob of Fabric Tac that had oozed out and basically dried in a very nice glob. This stuff does not dry hard, but is very flexible. I was playing with the glob and then started stretching it and got these very interesting bubbles inside the glob - and it became the center of my flower...

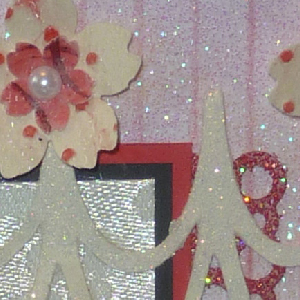
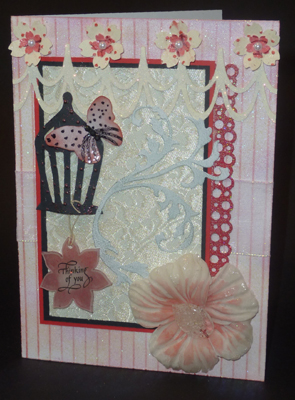
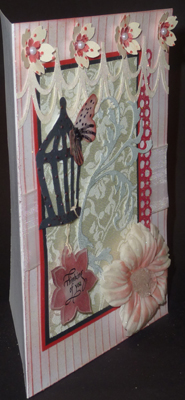
I created the scalloped piping border in my photo altering program. I made an oval and placed another oval within, stretched it a bit, copied and pasted it to create the 2nd oval shape and then hung a few together to get the look of piping on a wedding cake.  then cut it out with my Cricut, smeared a glue stick all over  and sprinkled Ritz micro fine glitter "Warm Highlights". I really love this border and will be using it again.

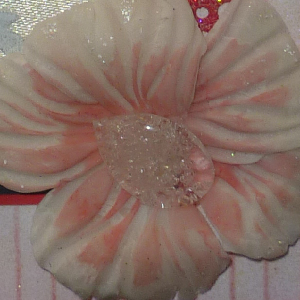
The flowers are punched out Sakura blossoms using Carl punches. The larger one is from cream toned cardstock, run through my machine with the Cuttlebug Swiss Dots embossing folder, high points touched with Distress Worn Lipstick then clear embossed. The smaller one is white cardstock, totally sponged with the Lipstick, rubber stamped with the small Flourish using Aged Mahogany and clear embossed. They're glued to one another, then with a stylus, formed them to stand up a bit. When glued to the card the white half pearl was added.

The butterfly and cage were cut with my Cricut. The cage was painted with charcoal acrylic paints, run through my machine with the Swiss Dots folder and embossed with Garnet embossing powder. I shaped it a bit, adhering it to the card with pop dots for a more 3D feel.

The butterfly was done on white cardstock, sponged with the Lipstick on the edges, clear embossed and dots and stripes added with a black Identi-pen. Three small black rhinestones were added for the body.


I die cut the largest flower shape (Spellbinders Poinsettia) from some Shrink Plastic, sponged the Lipstick on the edges and stamped the sentiment with Versafine Black Onyx. I added some gel pen veins (not very visible) and punched a large hole. I then shrunk it with my heat tool. Attached it to my birdcage with some thin twine.

I die cut the Leaf Flourish (Boss Kut) from some white cardstock, a rubbed my dirty finger over it (it had some metallic Rub Ons on them).

Punched the dot border from white cardstock using Martha Stewart Around the Page set "Bubbles". Sponged with Lipstick and embossed with Red Dragon embossing powder.


The background is white cardstock scored every 1/4" using Martha Stewart scoring board. Sponged lightly with the Lipstick, then more firmly on the score lines and then clear embossed. Adhered to the main white card, edge to edge, tucking the horizontal white gauze ribbon underneath.

I layered a cream toned silk damask material onto a black cardstock then on to a bright red cardstock, leaving only a scant border around each. Added the the red bubble edge and layered that on to my card.

Adhered all the other elements.


Side view


Please use your back button for previous pages or should you wish to go to the Misc Challenges 2011 Gallery please click on

or to go to the previous Misc Challenges Card Gallery click HERE

or  And More Gallery for hand made greeting cards please click the link below.

More Cards Gallery

 
Home Page Index
(text only)
Glass
Gallery
"And More"
Gallery