CreatedByHandChallenge.Wordpress.com
March 29/11  "Glitter - A Smile"

ID: CBH March 29/11 - Glitter - A Smile card
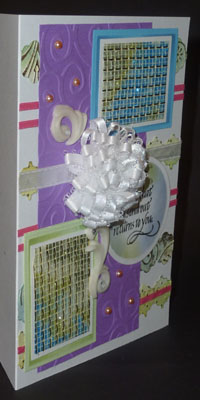
5"w x 7"h

Created: March 2011
Modified:


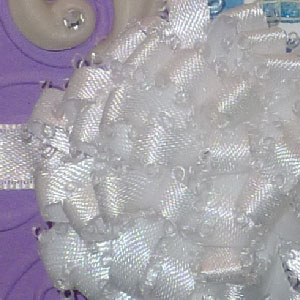
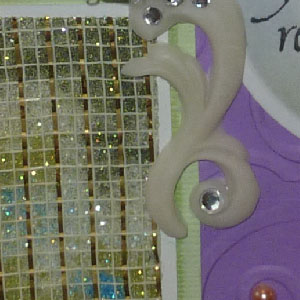
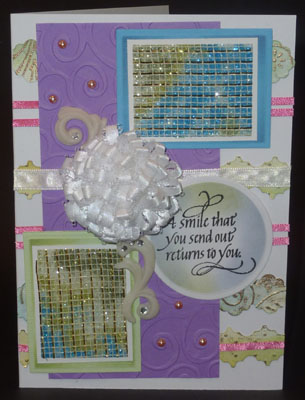
See that flower smack in the center of my card (or almost center)... that's from a tutorial on Becca Feeken's blog. Then those 2 glitter rectangles - ah, that's explained below BIG GRIN - and that's how this card started.

This card also uses a quote from Quietfire Design

Stamped the quote on white cardstock with Versafine Black Onyx stamp pad, clear embossed, die cut with Spellbinders circle die and sponged the edges with some Shabby Shutters & Tumbled Glass Distress Stamp pads.

The main card is white.

The flower: I used white 1/4" picot edged ribbon by approx 100" (8.5ft) and a 12" ruler.  Put a piece of tape on one end of the ribbon and adhere to the start of your ruler. Wrap ribbon around ruler at a diagonal, about 20º (or something similar) - the reason for this is when you push the loops closer together later they're not so tight around the ruler that you can't move them easily). When you get close to the end of your ruler, push the loops down, so they sit right next to each other without overlapping, and continue wrapping the remainder of your ribbon, until you get either to the end of the ribbon or the end of being able to wrap anymore... Put a piece of tape at this end too so nothing unravels. Put a piece of Sookwang tape along the bottom of the looped ribbon very, very close to the edge, don't remove the liner yet (3mm to 5mm at most - the narrower the tape the more the flower will be able to flatten for mailing). Carefully remove all the loops from the ruler and lay down on your work surface. Becca uses a tapered handle from a paint/makeup brush to create the flower. The thicker the taper the larger the center hole will be. I used something that was about 3/8" diameter. Hold a piece of the ribbon loops on the handle and start removing a small portion of your release tape, wrap the ribbon around the handle till it hits the sticky part of the tape and press down. Now you're ready to continue wrapping and removing the release liner as you proceed. Keep your bottom edge aligned. When you get to the end of your ribbon, keep the release liner on, on the portion you won't be covering. (NOTE: I also put a very thin piece of ribbon around the bottom of my wrapping - didn't want to leave the sticky tape.) Snip off any loose ribbon ends. Fluff up


The rectangles: I recently bought some Floral Wrapper in white/gold at one of the art stores I frequent (starts with an M...). I put it on a piece of Sookwang tape then sprinkled Ritz micro fine glitter. Some Royal Blue, then areas of Chartreuse & Peridot. Burnished into the adhesive and removed the excess putting the mix in my container for mixed glitter. I then sprinkled Stampendous Crystal Snow in the areas that had no glitter. Die cut with a Spellbinder's Rectangle die. Then die cut a larger rectangle in both a pale green and a pale blue Bazzill monochrome cardstock, sponged some Distress colors around the edges and adhered my glitter rectangles.

Embellishment: I also recently got some 3 D embellishments I really liked, so made molds of them with Suze Weinberg's Mold 'n Pour, then pressed Air Dry Polymer Clay by Lumina (it's translucent opaque color) into the molds along with the rhinestones, cleaned up the edges and let them dry over night. Adhered them to the card with Golden's heavy Gel Medium.

The horizontal strips: I'm using Nellie's rectangle #3, the largest decorative die, cut the piece in half and placed it back in the die to cut a mirror image of the border. Then I noticed the negative portion of the cut out was very nice too, so did a mirror image die cut of that as well. Ran it through my machine with Cuttlebug folders "Swiss Dots" and the flourish design from the "Love is in the Air set. Hit the high points with a pigment pad and embossed with Queen's Gold embossing powder.

I also used 10mm white satin ribbon and 3.5mm pink ribbon

The lavender cardstock when through my machine with the Cuttlebug D'Vine Swirls folder. I also added some small pink toned half pearls.

Side view

Please use your back button for previous pages or should you wish to go to the Misc Challenges 2011 Gallery please click on

or to go to the previous Misc Challenges Card Gallery click HERE

or  And More Gallery for hand made greeting cards please click the link below.

More Cards Gallery


Home Page Index
(text only)
Glass
Gallery
"And More"
Gallery