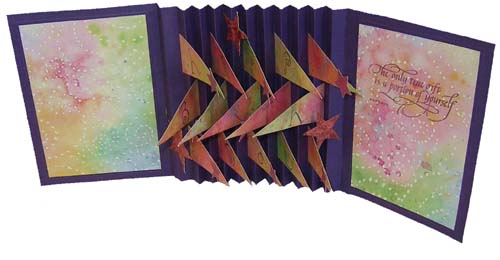
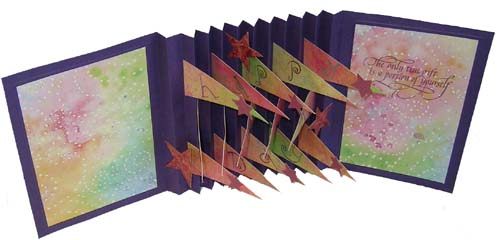
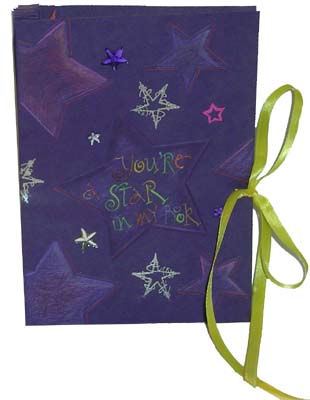
CCFlag_Closed

Closed view

ID: CC Flag Card
5"w x 7"h
Opens to: about 20"

Created: May 4, 2007
Modified: 

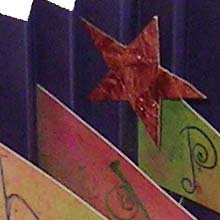
I used 3 sheets, 8.5 x 11 value pack dark purple cardstock from the Purple Passion set and 3 sheets of scrapbook paper 12 x 12, in complimentary colors and patterns.

I 
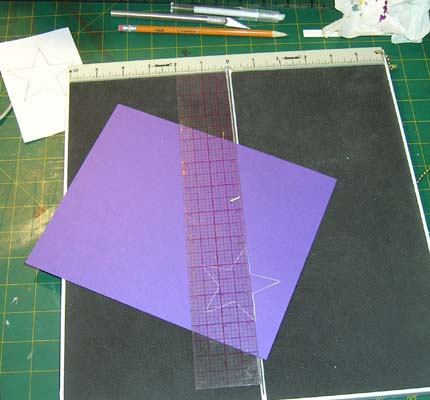
drew my stars one by one on the cardstock with a soapstone pencil. Embossed my lines with the Scor-It board.
Note: for those of you who are a little timid in creating things other than just straight lines, and or have problems finding the "love" on the board, See photo below with tips.

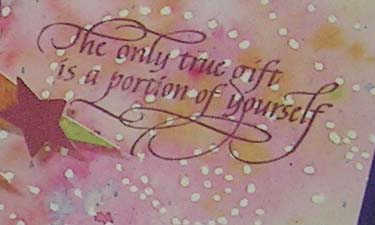
Used colored pencils (various shades of pinks, mauve and purple) for both a shadow outline and coloring in lightly inside each star. Wrote my words with a type of script nib and various colors of gouache with Schmincke Gold powder sprinkled on top.

Words: "You're a star in my book"

Rubber stamped some stars with Brilliance Dew Drops "Platinum Silver" and embossed with Stampendous "Detail Silver". Glued on some mauve and clear rhinestone stars with Golden's soft Gel Medium (tried it first with WeldBond, but they fell off). Added a lone pink star sticker. Tied it with a bright yellow ribbon.


ScoreIt


You can see my soapstone pencil at the top of my work space. The template of my star is to the left, and the image has been transferred to my purple cardstock. 

I scribble the soapstone pencil on the back of my template (just like you do with an HB pencil), place the template in the area I want it on my card and with a pencil (or stylus) went over my lines, transferring the soapstone to the cardstock. Soapstone is removable with just a tissue. So no undue pressure on your scored lines

I use a long clear ruler (12" minimum), and butt one edge at the top, against the Score-it ruler edge and a fraction away from the "love" bar. The reason why I butt it up against the edge, is because sometimes my page covers the whole bar and this way I know my ruler is straight and aligned with the bar. I hold that top portion down with my left hand while sliding the card around until the line I want to score is aligned with my ruler. I hold my card in position while I shove the ruler away and start to score.


CCFlag_Open2

Open #2

CCFlag_Top

Top View

CCFlag_TopDetail1b

Detail 2

This time I scored all my fold lines with the Scor-it. (11 x 1/2" accordion folds). I did one splice, gluing one piece of cardstock to the other within the center fold.

I zyroned my 2 pieces of scrapbook paper together (1 piece is a watercolor look (pinks, gold's, soft green) and the other is a rose colored mini weave pattern) so the flags would look good on both sides.  Cut out my flags and with the gouache from above, wrote a letter on each flag to spell the words "Happy Birth Day". Added a few random stars (used my paddle punches for a traditional star and a modern star) gluing them in reverse.  Glued them on alternate folds. Cut out a few larger stars from a very textured salmon toned leatherette cardstock and glued them to some of the folds. 

CCFlag_TopDetail1a

Detail 1

I cut little slits in the first and last fold and at the fore edge of the front and back covers for the ribbon to slip through. The cardstock I used was on the flimsy side, so I cut another piece the exact size of the covers, scored an inner border on each and glued them to the backs of each cover leaving the area where the ribbon slips through free of glue. Now the covers had some substance and could hold the accordion and flags without tipping over. Then I cut out  2 pieces of the scrapbook paper (same watercolor look but with swirled dotted lines) to fit within the embossed frames I made. I rubber stamped the quote (Quietfire design "The only true gift") with Versamark Dew Drops stamp pad "Perfect Plumeria".


Should you wish to go back to the Misc Card Gallery please click on the link below.

MiscCardsGallery


Home Page Index
(text only)
Glass
Gallery
"And More"
Gallery