| For this class we worked with all
kinds of instruments, especially Parallel Pens. We started out drawing the
letters on our practice, 8 to the inch grid pad. I worked on Arches Text Wove,
Arches 90lb HP watercolor paper & Full
Spectrum cardstock in Black. At the end of the 2nd day, we again were
given
a beautiful cardstock (matches a grey creamy toned parchment paper) to
make an accordion, portrait style, type booklet, where we would paste our
artwork, and tie it up with a ribbon. OK, I have the
cardstock, for this one too...but I didn't create the same booklet like everyone else....
So does this sound familiar LOL. Are you groaning again... I created
another hard covered booklet with white mat board that I decorated.
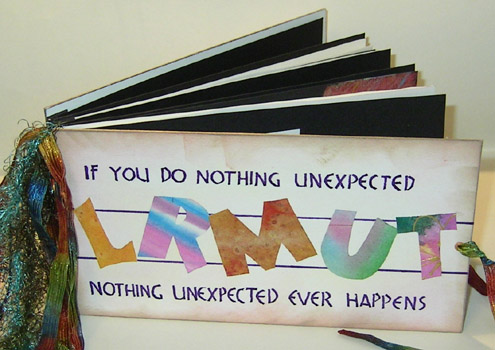
I cut my covers (8"w x 4.25"h) from a basic white mat board. Used the black full spectrum cardstock (which has a nice feel to it without being too thick), to create 1/2" accordion folds to attach my pages to. I added the eyelets and ribbon to keep the book closed. Three of the pages are double wide and folded in half and sewn onto the accordion fold. I had to do it to my title page because I created it too wide. So I figured I'd repeat that style of page to add other long items in the future. The regular pages are 7.5"w x 4"h I generally like knowing in advance what the end product will look like so I can plan ahead. For the Bookhand booklet, we knew we were going to make a booklet , but not what type, other than our pages were supposed to be 4 x 6" portrait style. So that booklet was a bit plainer than I would have liked. But for this one, I now knew what we were going to end up with and could design accordingly. I'm very happy with this one. A lot more detail work. I thought I'd do a real exemplar and have every letter of the alphabet become it's own sample for the different styles and techniques you can do with style of lettering. Lots of fun. |
|
ID: Book standing open |
For the cover, I used Pan Pastels (they are a luscious, silky soft pastel in a cake form), Bright Yellow Green Tint & Permanent Red Tint, applying it with a makeup sponge all over. I then touched the edges with Color Box Chalk Stamp pads in Rose Coral & Blush Rose. Edged the mat board with a Krylon Gold Leafing Pen. Used my 1.5 Parallel Pen and Violet ink for the horizontal lines and the quote lettering. The large letters are cut from various decorated background papers I've had laying around. I added several fibers to the sewn in sections as well as some beads. Gives a bit more pizzazz The tie ribbons are run through the eyelet and glued to the inside of the cover and then I glued a cut out 1.5" circle of the same decorative papers to hide the glue in. |
|
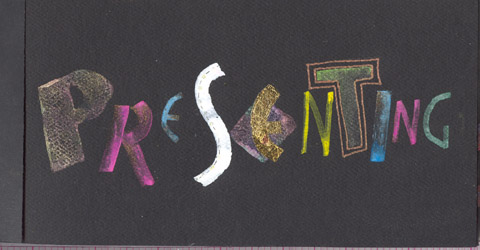
This may be the first page in the booklet, but it was the last page I created. This is a very heavy black cardstock which i can't remember the name of. The "P" is hand carved into Speedball rubber, Twinkles H2o's in various interference colors brushed on and misted with water, then stamped onto the page. The "R" & "E" are gouache mixed with gold powder. The "S" is bleed proof white (and there were yellow Stickles dots, but they somehow got removed). The next "E" is a rubber square with Twinkles, when dry, the e was gold leafed with variegated and misc. leaf. The "N: is just plain yellow gouache. The "T" is Sakura Gold gel pen and a green Metallic pen moved with water. The "I", "N" & "G" are gouache with gold powder. |
ID: P1 - Presenting |
|
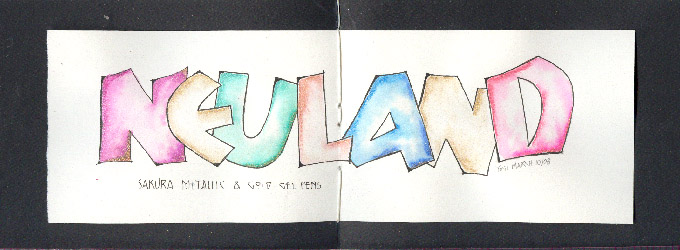
ID: P2 Neuland (15"w) I drew in my letters and outlined them with a black micron pen adding some thicker sections in the corners. Colored each letter with Sakura Metallic & Gold gel pens, lower corners are the gold and upper corners are the Metallic, in various colors, moving them around with water. |
|
To see detail pics and descriptions of each letter, click on the next page button at the bottom of the page. |
|
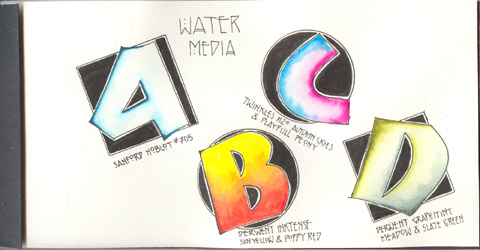
ID: P3 A-D |
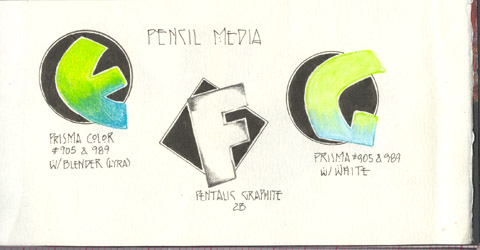
ID: P4 E-G |
|
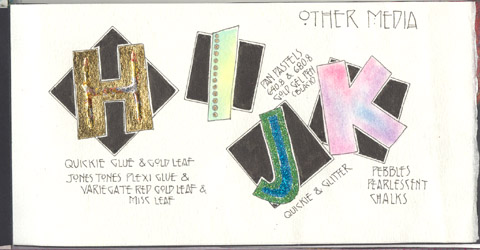
ID: P5 H-K |
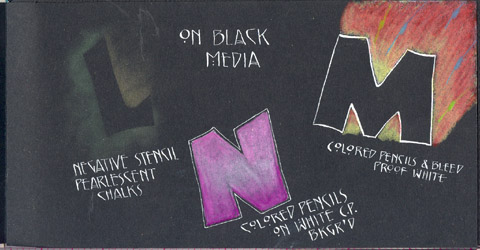
ID: P6 L-M |
|
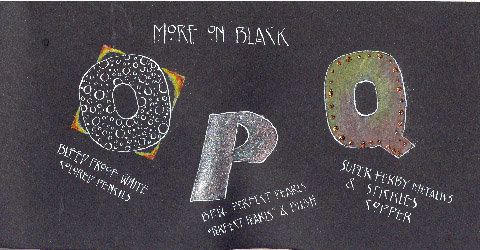
ID: P10 O-Q (pages 7 to 9 are still empty) |
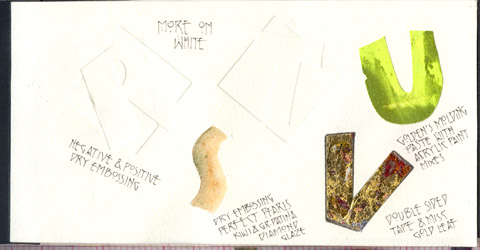
ID: P11 R-V |
|
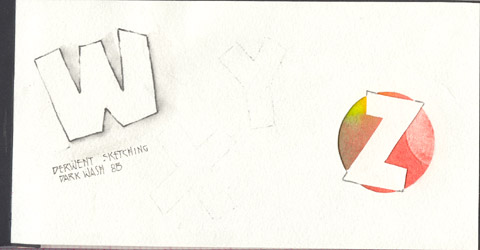
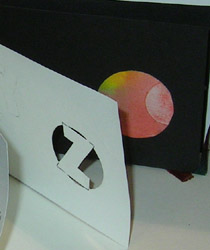
ID: P12 W-Z (x & y are only light outlines so far) |
ID: Z Detail |
|
ID: P13 Sun (behind the "Z") I drew in my letters and outlined them with a black micron pen adding some thicker sections in the corners. Colored each letter with Sakura Metallic & Gold gel pens, lower corners are the gold and upper corners are the Metallic, in various colors, moving them around with water. |

|
Should you wish to go to the main Calligraphy Gallery please click on the link below. |
Please use your computer's back button for previous images Thank You or click on the Home button below to go to the Roann Mathias Class Gallery or next for the next page
|
| Home | Page
Index (text only) |
Glass Gallery |
"And
More" Gallery |