Heather Victoria Held - Enchanted Letters P2"

Created: June 9, 2019
Modified:

Lettering done with a combination of Gillot 404,  and Nikko G nib, most with either Macaffrey's "Brown" ink or Copic White Opaque mixed 50/50 with H2º

Day 2 was just as fabulous as day 1.


ID: "E" 

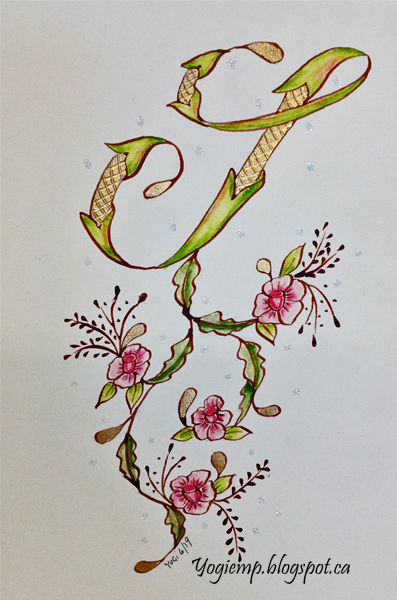
I drew the "E" on Arches 90# HP watercolor paper adding the flowers and leaves. Inking everything with the brown ink.

Applied my gilding adhesive, then Robertson Red Gold 23kt leaf. Tooled the gold with a very fine pointed stylus.

Colored with Staedtler Karat watercolor pencils and moved color around with a wet paintbrush.  PS I normally color with Derwent watercolor pencils or Inktense pencils, but these Karat pencils work really well.

Added the sprig details with the brown ink.

Sponged a bit of Pan Pastels "Violet Tint" and "Pearl Medium".

Final touch added Swarovski crystals (SS6 - 1.9mm). A great tip Heather shared is adding the crystals using a piece of kneaded eraser to pick up and place the gem. It work fabulously, better than any pick up tool I've ever used...

ID: "P" 

Again I was in a mood to work on black and used the Artagain paper. A little disappointed with the shape of my P at the top slope which isn't rounded enough... Sigh

Inked the "P" with the Copic white mixed with water. Love the roses that I learnt in Gemma Black's class.

Applied my gild adhesive and used Robertson "Aluminum" leaf. Tooled it with the small balled stylus.

Colored the stems by applying a light application of white Prisma colored pencil. Then a blue (#903) at the point sections and a bit in the body area, then overlaid the green (Chartreuse), then blended everything with the white pencil. Love the shading results.

The flowers were colored in the white and then a light touch of yellow.

Added more details with the Copic ink.

ID: "Acanthus Leaves" 

Heather was demoing several ways of painting the leaves. wet on wet, dropping color in, etc. These are the results of my playing... using Winsor & Newton "Green Gold" and a bit of Permanent Sap Green, and a touch of Winsor & Newton Quinacridone Magenta.

ID: "S"

Another demo creating a border or tail of a letter with the "C" shape. There was also one done starting with an "S" shape and continuing on with the "C" shape.

Drew my letter "S", inked with the brown on Arches 90# HP watercolor paper. 

Applied the gild adhesive and the Red Gold leaf. Tooled with the small balled stylus.

Ribbon sections painted with Winsor & Newton "Green Gold" and a bit of Permanent Sap Green, and a touch of Winsor & Newton Quinacridone Magenta.

Foliage painted with Chromium Green and the Sap Green.

Details added with the brown ink.

I applied Quickie Glue dots and sprinkled with Stickles dry glitter "Diamonds"

ID: C Column Border

Playing with the border using the "C" design. 

On Canson 90# CP watercolor paper (smoother side), drew my design, inked with the brown and colored with watercolors.

The leaves as above. The deco style roses with yellow and then a line of red and blended with water. The squiggly lines representing fern leaves with the brown ink. The teardrop ends of the "C's" with Gansai Tambi  gold paint'

Please use your back button for previous pages or should you wish to go back to the Heather Victoria Held Class Gallery please click on the link below or click next for next web page.

Heather Victoria Held _ Enchanted Letters

Home Page Index
(text only)
Glass
Gallery
"And More"
Gallery