|
|
CreatedByHandChallenge.Wordpress.com
Created: October 3, 2009
"CBH Oct 6 - "Stencils -
Glitter Cups Card"
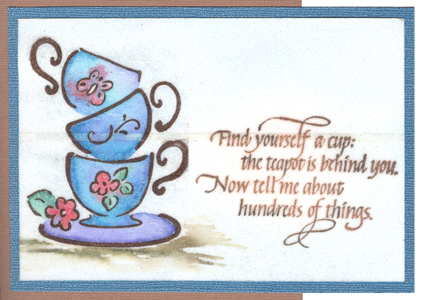
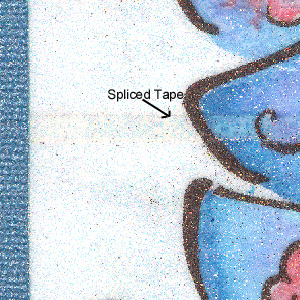
So I covered a piece of white cardstock with double sided tape. NOTE: I overlapped my 2.5"w tape to get the height I needed, and usually that will work... But you can see by the pic below, the overlap is visible on this card. I should have used a sheet and cut it down to size. I usually work with colored glitter, where it's not visible, but with clear and the highlight glitter you can see the overlap - use the sheets cut down. |
|
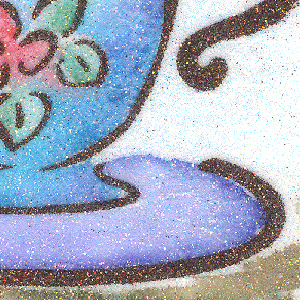
I lay my brass stencil of the cups onto the tape and used a black sharpie to draw the outside edges. I then cut through only the release paper and smaller than the outside edges of the stencil so when the stencil is put back down there is no gap for the dark glitter to attach itself to. Lesson learned after doing the first one. I had a miniscule gap and it showed. So removed the release paper, pressed down really well with my stencil and sprinkled Glitter Ritz micro fine glitter "Bronze". Rubbed to try and get the glitter stuck well, but it's impossible to get the glitter pressed down in those little lines. Tapped off the excess back into the jar and used a brush to brush of as much of the loose glitter from inside the stencil lines, then used a damp paper towel to remove the rest. Carefully removed the brass stencil (see tutorial in the Nitty Gritty glitter gallery) and sprinkled "Warm Highlights" over the rest of the tape. |
|
|
|
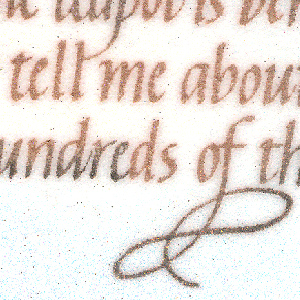
I colored the cups with Tombow watercolor markers and a waterbrush which I dipped into water rather than filling the barrel. More control of how much water to use. I used two tones of blue with a bit of violet for the cups, and the violet for the saucer. There was a touch of the bronze glitter below the saucer, so I just touched it with a brown Tombow and a perfect camouflage. I rubber stamped the quote (Quietfire Design) with Versafine stamp pad, Vintage Sepia, and touching the stamp again with a bit of Onyx Black, then clear embossing it. Mounted the artwork to a Bazzill Bling blue cardstock then onto a deep brown Textura cardstock. Now because I wanted a 7"w card, I had to off set my fold and the artwork spans over the front. When the card is closed, the inside of the card, is also brown so it's not noticeable at all. |
|
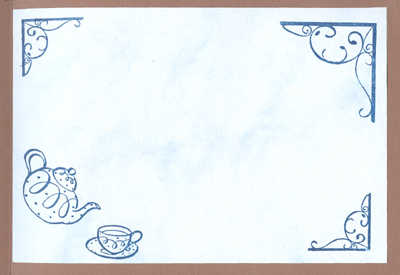
I used a piece of blue marbled paper for the inside, trimming it so it was smaller than the artwork on front and hidden behind it. Rubber stamped the teapot and cup (See D's "Hats of to You") and the corners (Daisy Bucket Flourish Brackets #5011) with Versafine "Blue Lagoon". |
Inside of card |
|
|
Please click the Home button for the Created By Hand Challenge Gallery 2009
or use your computer's back button for previous images. Thank You
|
to go to my "Misc" or "More" Greeting Card Galleries, click one of the links below
or
to the CBH Challenge Gallery for 2007/2008 please click on the link below.
| Home | Page
Index (text only) |
Glass Gallery |
"And
More" Gallery |